
Basement conversions are one of the best ways to maximise your home’s plot and elevate its value – but where should you start with a project and is a cellar conversion a viable option?
If extending upwards into the loft to create a loft conversion or outwards into the garden isn’t an option for you, digging down may present the only viable possibility for expanding your home. Increasing the size of your property with a cellar renovation can be a surprisingly cost-effective way to boost its square footage, especially if you have an existing cellar or coal chute, as much of the required excavation work will have already been done.
Cellars are a common feature in many period properties, but as they were principally designed as a storage space, transforming this dark, often cramped zone into appealing, habitable accommodation can present a few challenges. Headroom is typically one of the biggest obstacles to overcome, as you’ll want a minimum clearance of at least 2m.
Additional structural works, waterproofing and insulation may also be required as part of the cellar renovation – not to mention that you’ll probably want to incorporate some means of bringing natural light in. Here, you can find out more about the 10 key steps to successfully undertaking a basement conversion and transforming your cellar into a new, liveable storey.
Don’t make the mistake of skimping on ceiling heights in your new basement conversion, otherwise the space will never benefit from the same bright, airy feel as the rooms on the upper floors of your house.
“We would advise no lower than 2m,” says Katerina Spetsiou, project director at Scenario Architecture. “You could make do with around 2.2m in a basement conversion but ideally you would want 2.3m and above.”

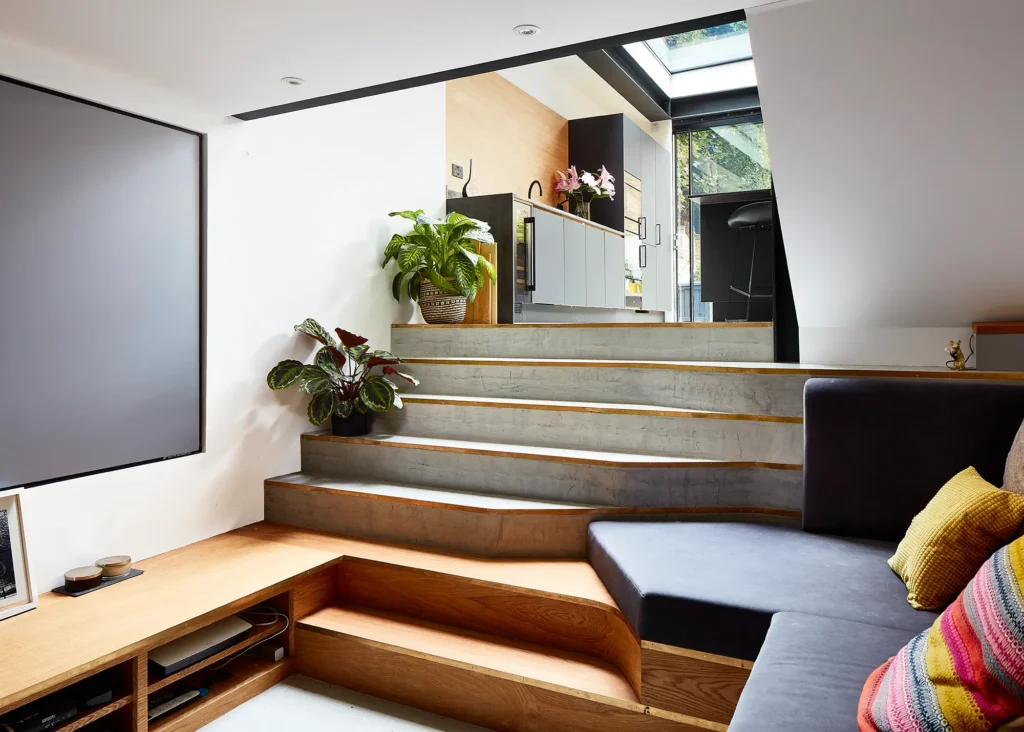
Scenario Architecture designed the renovation of this Victorian semi-detached house, including the extension of the existing underground space. As part of the works, the floor level was dropped significantly to create a sunken home cinema room and gym
Even if the existing floor-to-ceiling height gives you enough room to stand, installing extra insulation in the floor, plus a new finish on top, might mean you lose too much height overall. Further excavation work may be required if you don’t have enough headroom in your existing cellar.
This will significantly add to cellar conversion costs, so it’s vital that you factor this in at the start of your project. “For a finished basement conversion, depending on what you do, we’d estimate around £1,500 – £3,500 per m² for a simpler project scope,” says Katerina. “With excavation, we’d ballpark £4,000 – £6,000 per m².” Factors such as access, ground conditions and labour costs in your area will also need to be added into the equation.
Much of your basement conversion budget will likely go towards additional excavation and structural work, which may include steps to strengthen the structure and ensure the storeys are supported.
According to Rob Wood, managing director at Simply Basement, there are several main structural changes homeowners will typically want to make when undertaking a cellar conversion. “The first is to remove an internal supporting wall to create an open-plan space. Next is creating a door/patio opening at the rear of the property leading up to the garden,” he says.
“The third is dropping the existing cellar floor to create additional head height. Scenarios A and B will require RSJ steels and columns, while the latter means digging out and underpinning.”
A robust, high-quality waterproofing system is essential if you want your basement conversion to feel like any other room in the house. Barrier solutions are designed to keep water out of the building fabric completely, while others work on the assumption that water will get in. The latter type of system allows water to trickle into internal drainage channels before being transported away via a sump/pump system.
Note that insurers often require two forms of waterproofing, designed and installed by specialists, so there’s a fallback should the first line of defence fail. “There are lots of different options – you’ll need to assess the location and type of basement to decide what’s best,” says Katerina.

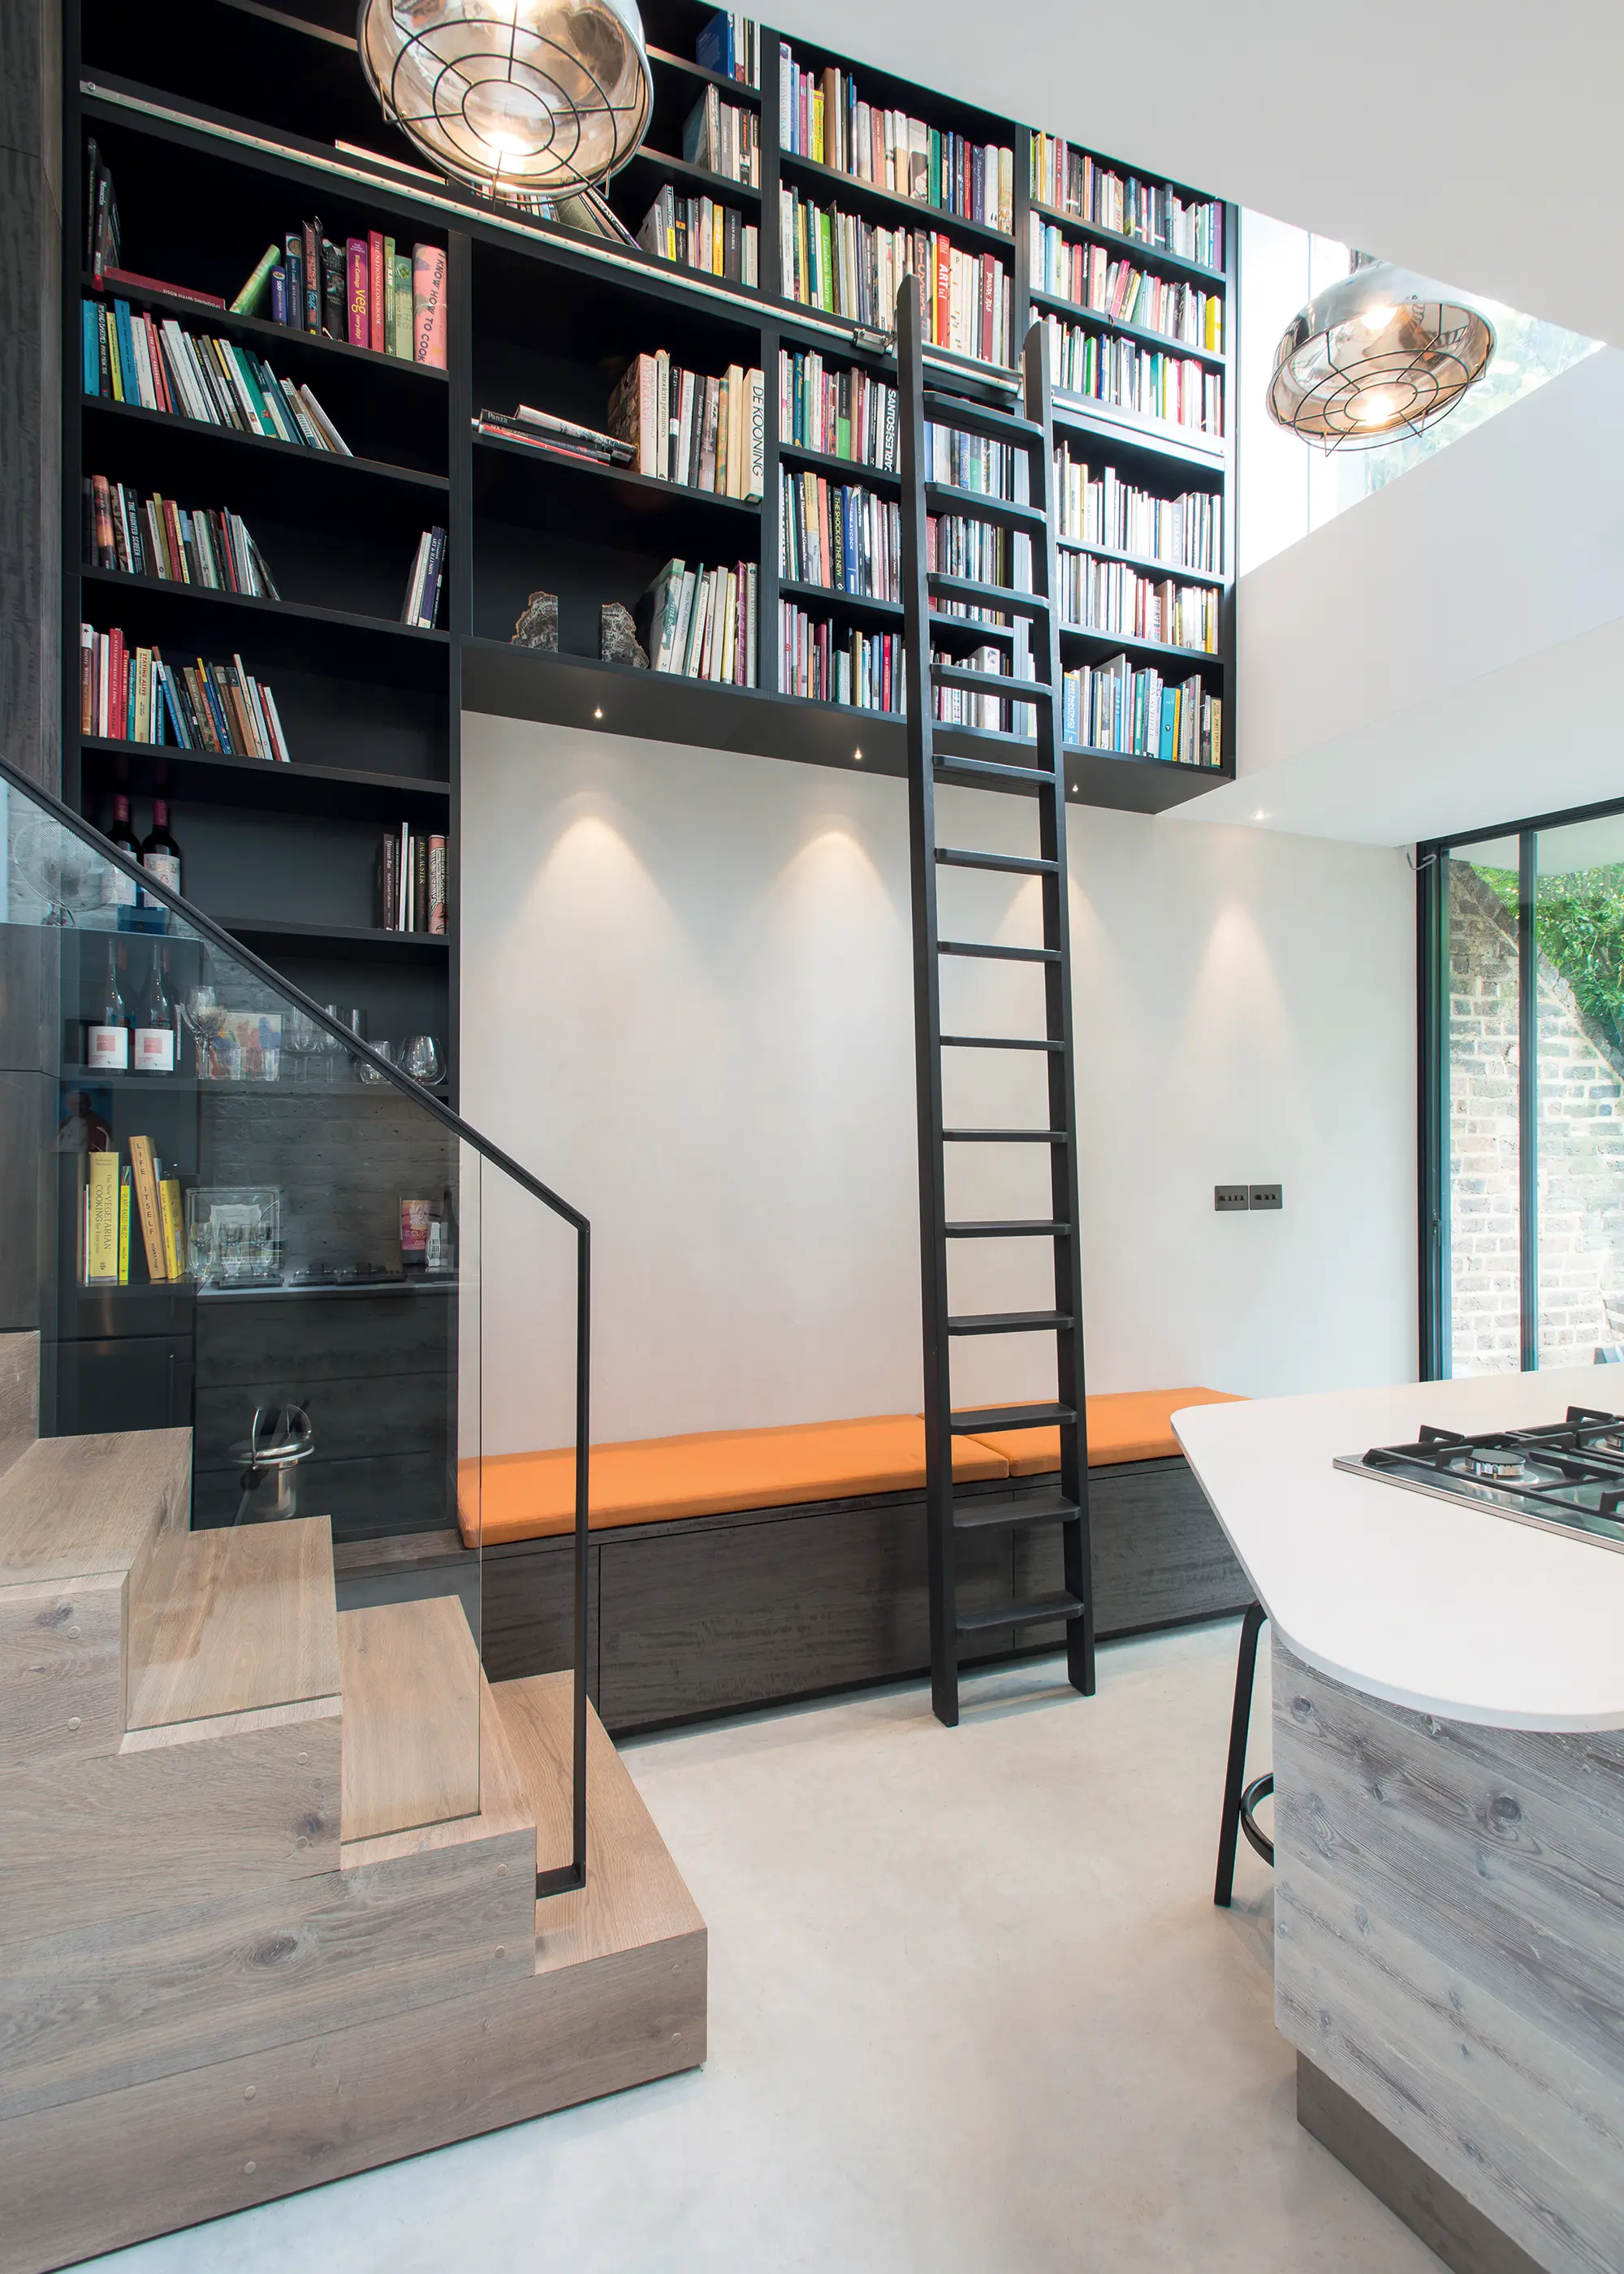
Double-height spaces are great for bringing light down from the floors above. This conversion project is by Robert Dye Architects, built by Peake Projects
The only way to get this right is to involve a professional waterproofing specialist right from the earliest design stages – certainly well before you get on site. The basement conversion’s floor will also need to be sealed and tanked, too. “Waterproofing is a crucial element for basement conversions and is very costly to fix if it’s not right in the first instance,” says Katerina.
FAQs basement waterproofing options & costsWhat are the different types of basement waterproofing?
How much does it cost to waterproof a basement?The cost of waterproofing a new build basement varies based on factors such as the chosen waterproofing method, the size of the basement, and the complexity of the project. While it’s challenging to provide a one-size-fits-all cost estimate, it’s essential to consider waterproofing as a valuable investment in the longevity and functionality of your basement conversion. “It’s difficult to provide one standard cost for a type A solution due to the variety of products on the market,” says John Spearman from Surrey Basements. John explains further: The most basic type A system – a liquid applied system such as a liquid damp proof membrane or a slurry – could cost approximately £15 per m² for a coat. There are many other choices that’ll increase the cost drastically, though. For example, an external geotextile type A waterproofing system would cost approximately £35 per m² or £50 per m² for supply and install if doubled with a liquid damp proof membrane. We also get asked a lot for a waterproofing membrane with additional qualities that can protect against ground gas. For this, a liquid system would cost £20 per m², per coat for instance. Clay-based systems such as Volclay bentonite systems, for example, cost around £20 more than geotextile systems per m². For Type C, it will cost around £35 per m², but there is an additional cost because of the sump pumps and battery backup, plus drainage – I would suggest allowing for up to £3,000 for these elements. If you’re going for waterproof concrete, bear in mind this costs about £40 per m3 more than the price of standard concrete. |
Underpinning a basement conversion involves excavating directly beneath the existing walls/foundations and infilling with extra concrete to ensure they’re sufficiently supported. “Underpinning is only needed if further head height is required or if the basement is to be extended,” says John Spearman, director at Surrey Basements.
The works need to be designed by a qualified engineer, and are usually undertaken in metre-long sections. If the ground floor above your existing cellar is going to be retained, additional steelwork may also be needed. “The cost of underpinning for basement conversions is dependent on how much more achievable height is required, but allow approximately £40,000 – £45,000 on a typical project,” says John.
CLOSER LOOK How to maximise light in a basement conversion project
|
There are many basement conversions specialists that offer the expertise of structural engineers, drainage and waterproofing consultants all under one roof. Or, if you’ve hired an architect to design your subterranean level and manage the project, they might appoint each of these professionals on your behalf. Whichever route you choose, it’s important to work with a team that has plenty of experience on this type of build.

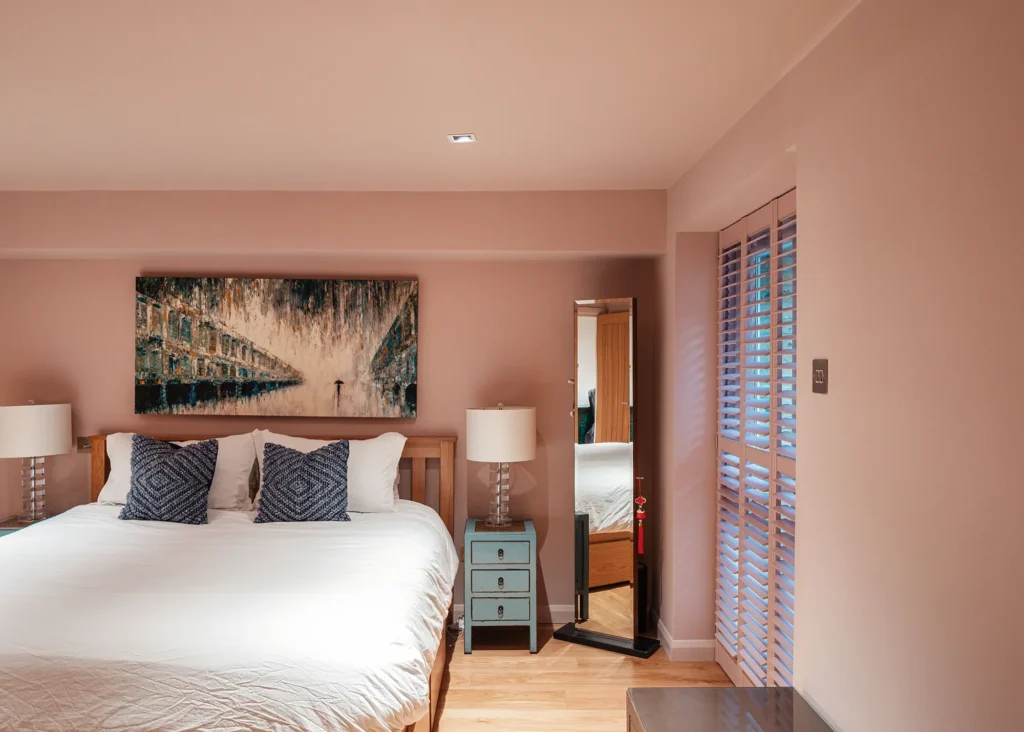
Mark Fairhurst Architects are behind the transformation of this subterranean space. The practice designed the extension of the cellar, including a new lightwell to ensure this new bedroom benefits from natural light
For instance, if you in tend to drop the floor of your cellar, a thorough site investigation will be required and you’ll need the advice of a specialist engineer. “They may need to dig trial pits to check the foundation levels of the house, or perhaps a drainage survey to ensure the digging will not affect any existing services,” says Katerina.
Converting your cellar into a habitable zone means you’ll need to comply with the standards laid out by Building Regulations. “The most important requirements for basements are fire regs (Part B), waterproofing/resistance to moisture (Part C), ventilation (Part F) and resistance to sound (Part E),” says John.
One notable requirement is that you’ll need to provide a clear escape route, ideally via an additional flight of stairs that leads out of the cellar in case the main flight is blocked.
Old cellars and coal chutes often conjure the mental image of a chilly, dank space – so to ensure your scheme is a success, you’ll want to pay close attention to insulation and efficient space heating.

In order to give the impression of more daylight coming into this TV den, Granit Architects added artificial lighting to the basement light wells
Basement conversions should encompass measures to enhance the thermal performance of the floors, walls and ceiling. The space can be heated via radiators or underfloor heating, depending on the budget you have available.
Bear in mind that if your new subterranean zone is adding significantly to the overall heating load you place on your boiler, you may have to upgrade – which can easily add £2,000+ to your costs. Any need for extra hot water (showers, kitchens etc) could be a key trigger here.
Adequate ventilation is vital for a healthy cellar renovation living space. “Normally there will be some windows or a small lighting well to allow air in. If not, extractor fans can be installed,” says Rob. Incorporating some form of mechanical ventilation is especially important if your basement has a bathroom or utility room that’s likely to become humid.
The amount of natural light a cellar conversion receives can make or break the scheme, so it’s worth looking at this aspect from early on so it can be factored into the budget. Lightwells offer an effective solution formed from a waterproof channel that leads up from your cellar to the outside at ground level.

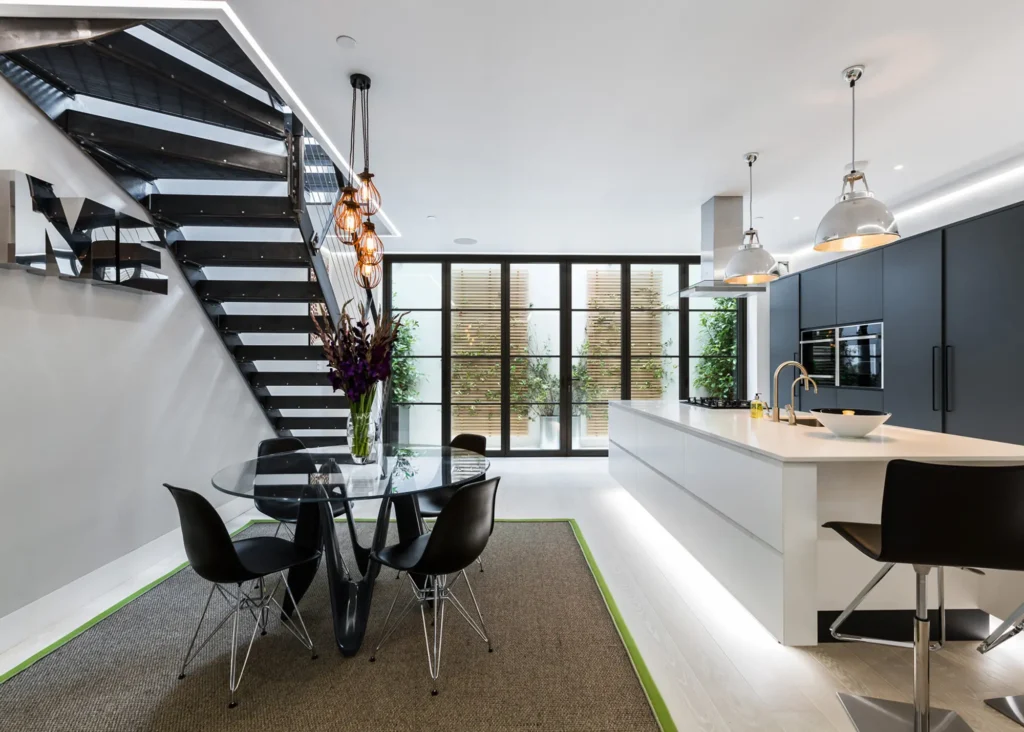
Designed by Simply Basement, a lightwell that spans the entire width of this basement ensures the contemporary kitchen-diner is flooded with light. A staircase with open risers and an open balustrade enhances the flow of light on the subterranean level
This setup may also provide a means of emergency exit in case of a fire. Bear in mind, extra structural work tends to be required if you want to incorporate this feature. Plus, if it involves major engineering or changes to street-facing elevations of the house, it may trigger the need for planning consent.
Walk-on rooflights made from structural glass are another effective means of pouring light into your basement conversion. One popular option is to site floor panels just inside of ground floor glazed doors, to make use of an existing source of natural brightness. Work closely with your designer and glazing provider to ensure the correct type of glass is specified.
| Want to know more about extending your basement?
Head to Build It Live and visit our dedicated Basement Advice Clinic for some invaluable guidance from the experts! Build It Live takes place three times a year in Kent, Oxfordshire and Exeter. The next show will be on 22nd and 23rd February 2025 in Maidstone, Kent. Claim a pair of free tickets today and start planning your visit. |