Save £1000s on professional advice
Early Bird Offer! Free tickets to meet independent experts at this summer's Build It Live
Save £24 - Book Now!Early Bird Offer! Free tickets to meet independent experts at this summer's Build It Live
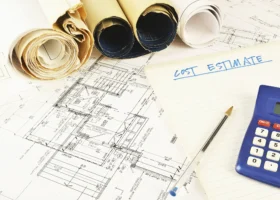
Save £24 - Book Now!Estimate your project costs instantly with Build It's interactive self-build cost calculator
Calculate NowGet an accurate, detailed cost breakdown of your project
Submit plans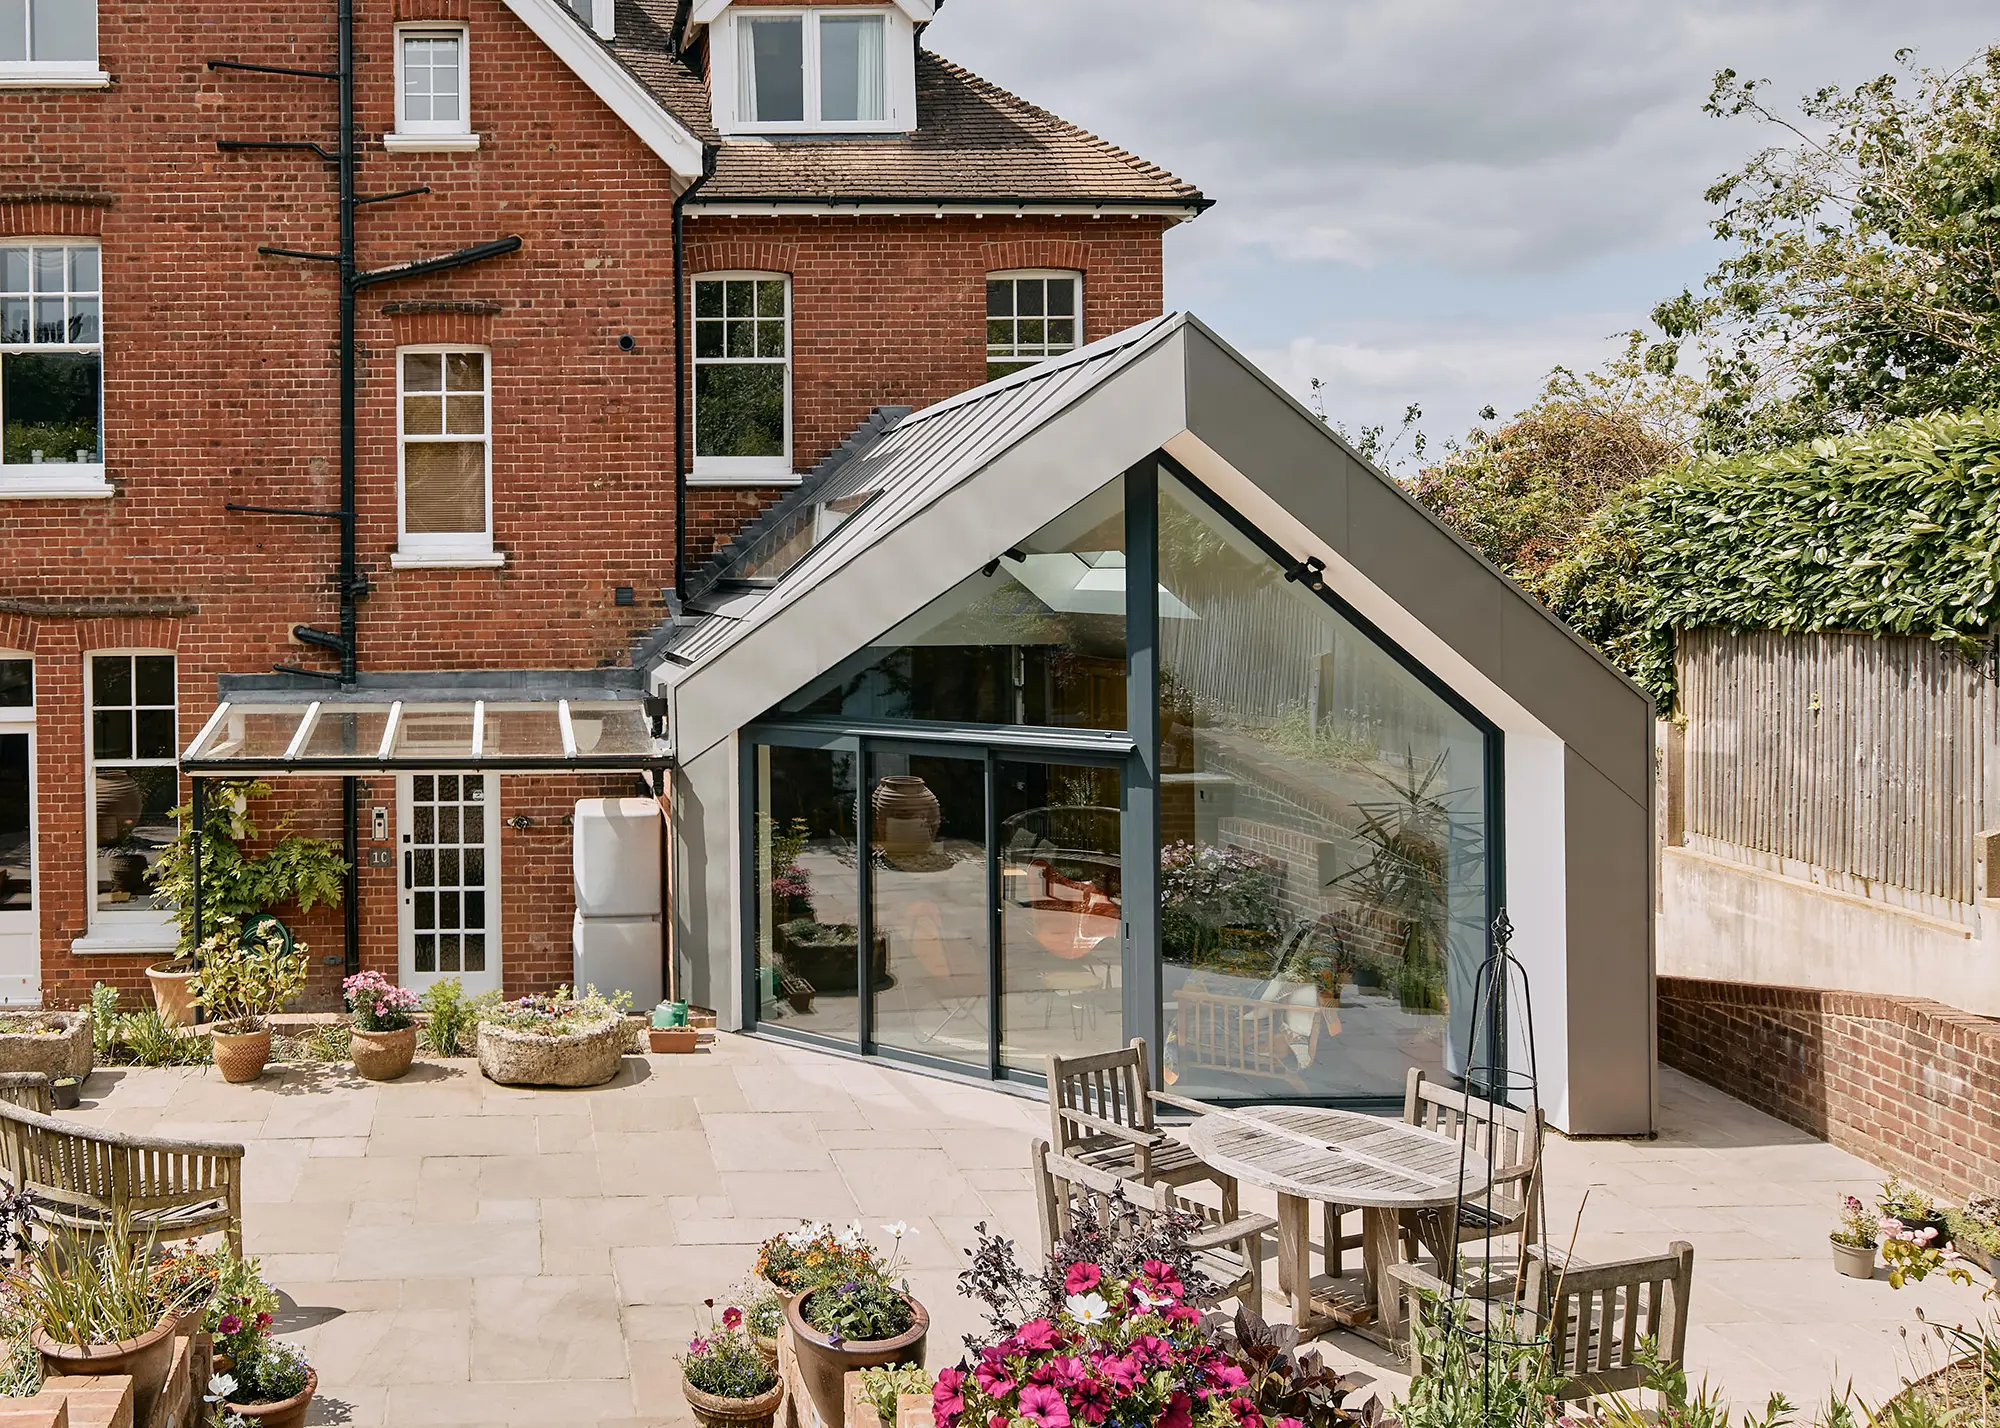
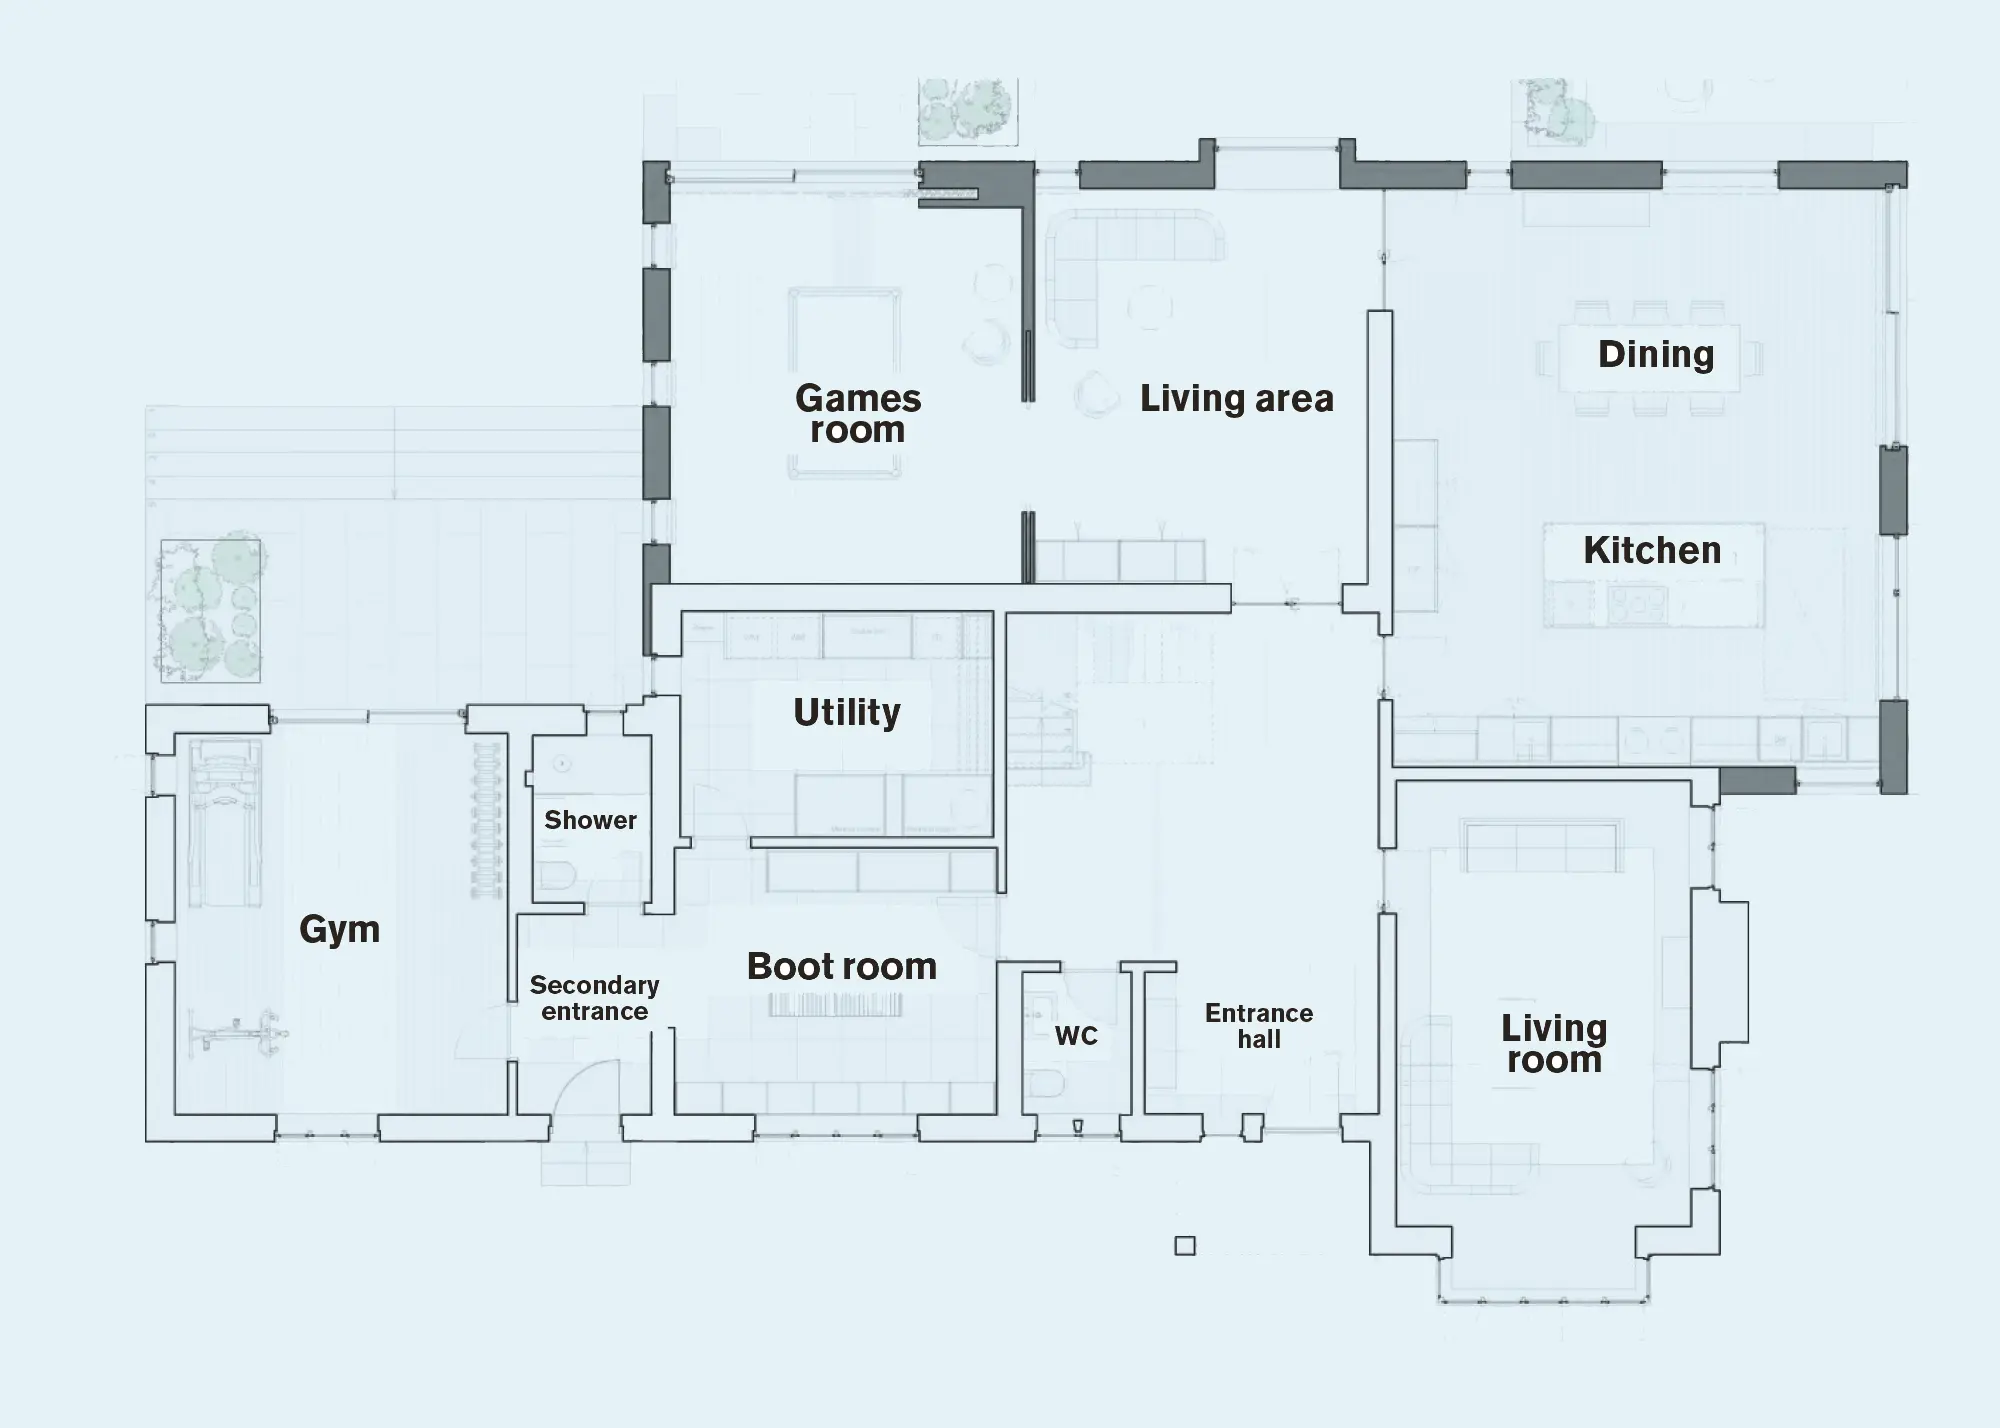
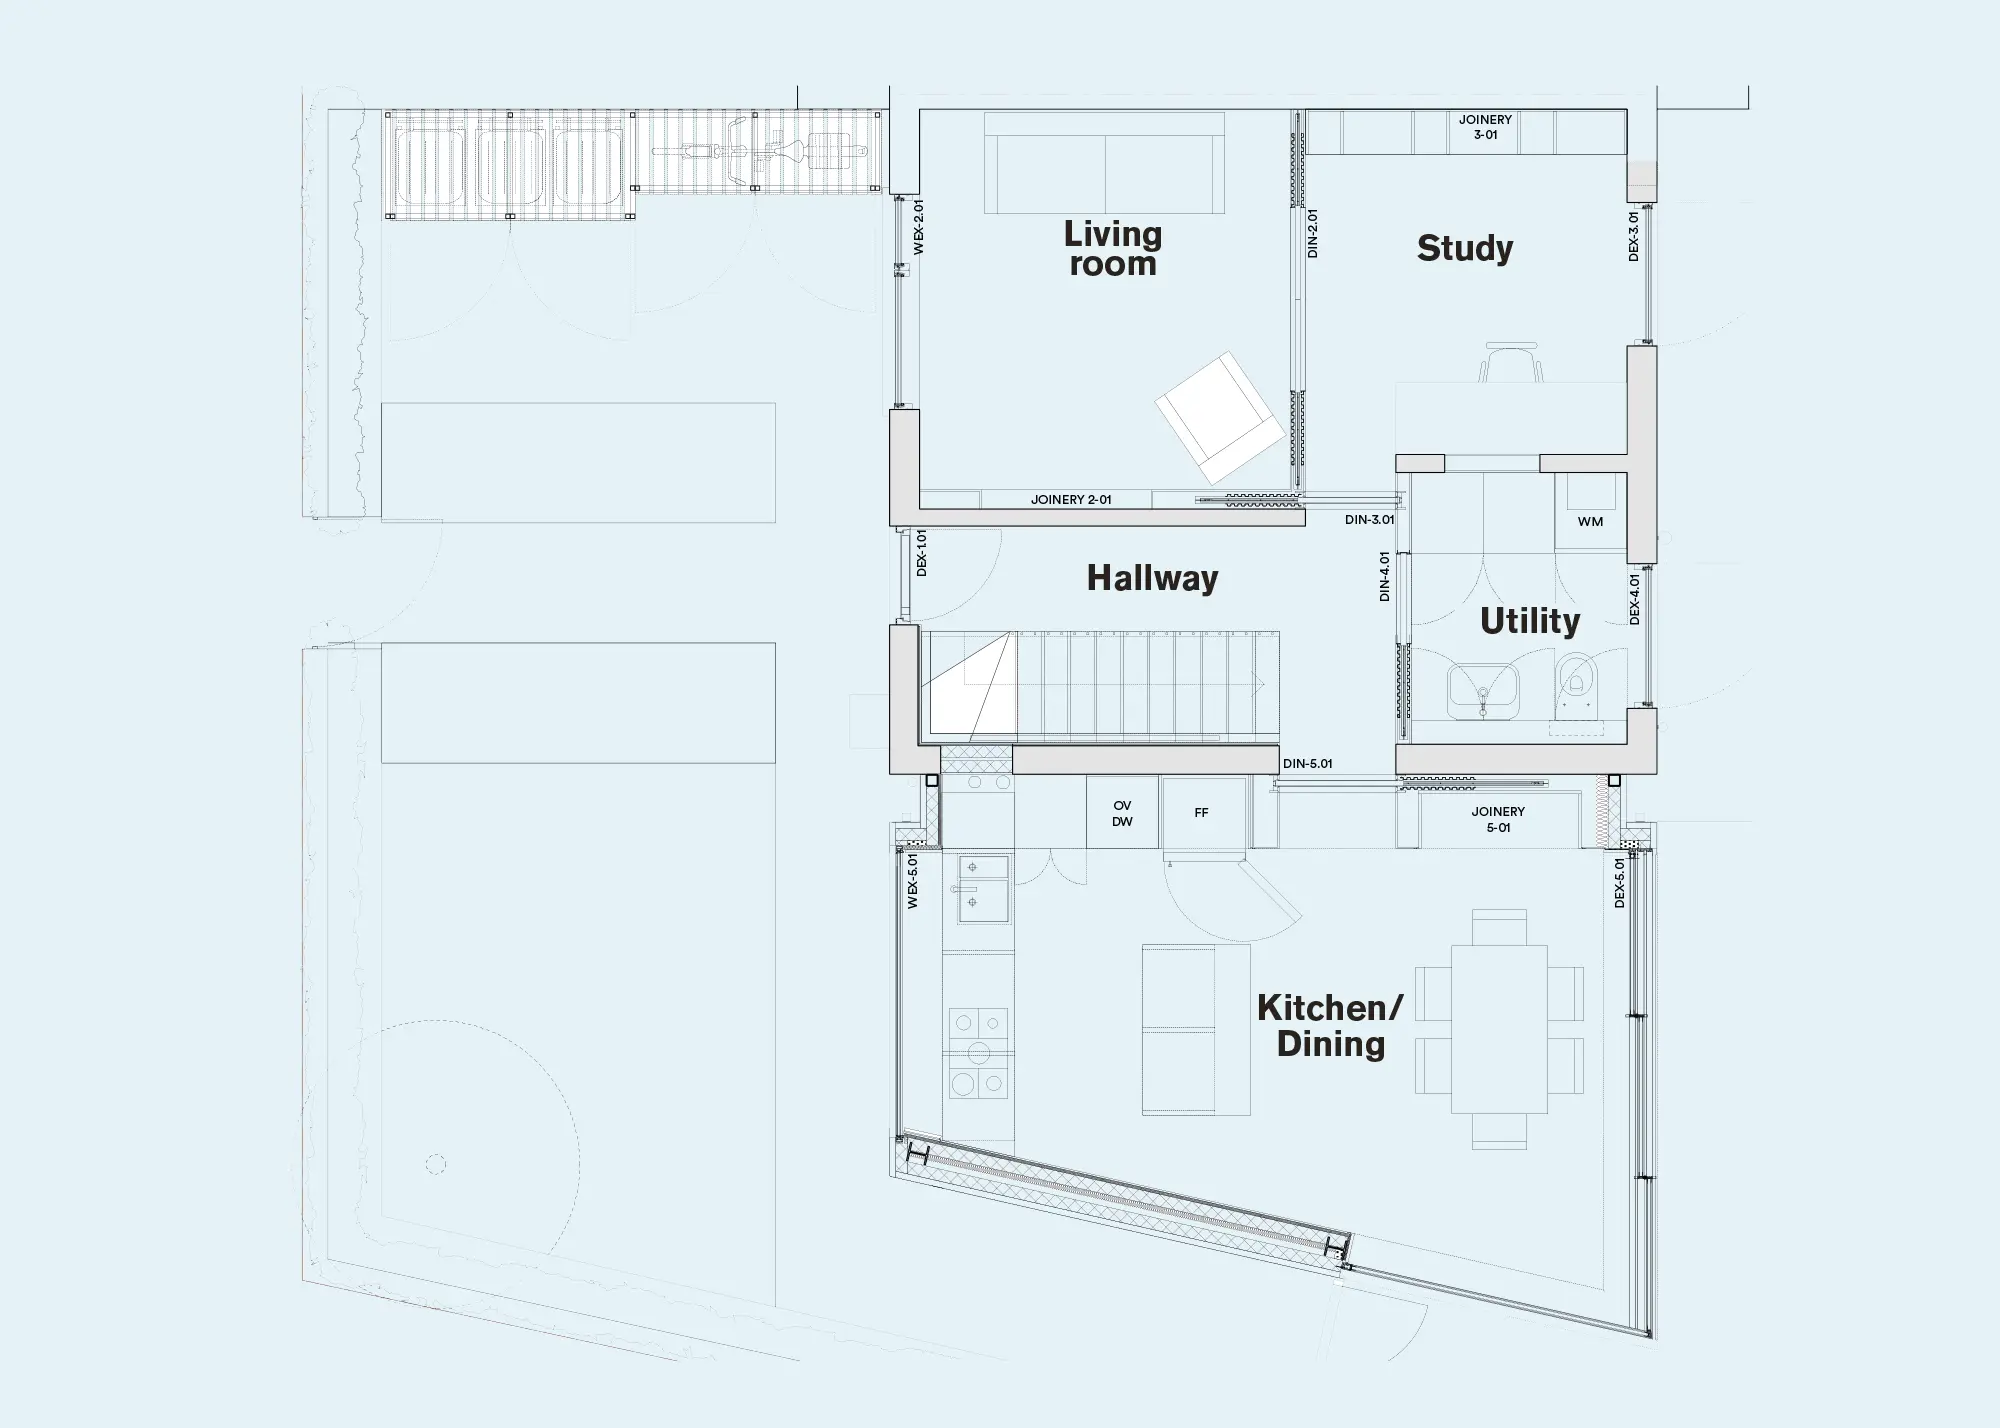
Choosing the right floorplan for your home extension starts with a clear understanding of how you want to use the space and the ways it can enhance your lifestyle. Are you envisioning a bright, open-plan kitchen diner to enjoy with family and friends? Or perhaps your aim is to create a cosy snug or an extra bedroom? Whatever your project goals, there’s a range of configurations to help bring your vision to life.
Your existing property and site layout will heavily influence the structure of your new home extension. Consider the location and orientation of your house to maximise natural light and make the most of surrounding views. Creating a connection to the outdoors is a common objective for this kind of project – your floorplan and layout should enhance this while complementing your home’s style and features. It’s also crucial to ensure the new space is seamlessly connected to your main property, avoiding the feel of an awkward or disconnected addition.
Effective use of space and budget is also key for a successful house extension. While full-width or two-storey structures can add significant value, careful planning can often reveal that you don’t need as much new floor space as you originally thought. By focusing on how you’ll use the extension, what will go inside and where everything will be placed, you can design a functional, efficient layout that utilises every square inch.
Don’t forget that specific rooms, like kitchens, often have standard size requirements for appliances and units. Think about where to incorporate clever storage solutions early on in the design process to help eliminate clutter and create a smooth, functional flow throughout the space. With these factors in mind, here’s a selection of five popular floorplan ideas to inspire your home extension project.
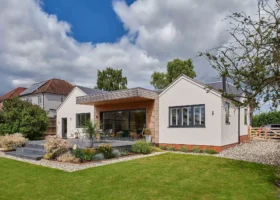
Rear extensions are popular because they’re often hidden from the front of the house, opening up creative design opportunities that don’t impose on the street-facing area of your property. Ideally positioned to provide that sought-after indoor-outdoor connection, rear extensions are most commonly used for increasing kitchen or living space. Plus, they’re a versatile option and can be designed in virtually any shape or size to suit your goals and budget.
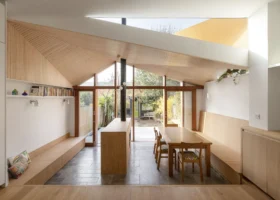
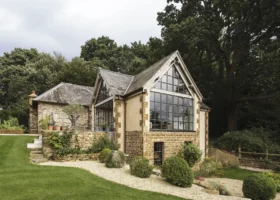
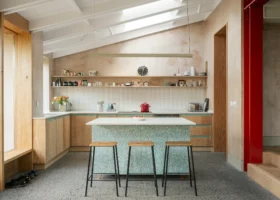
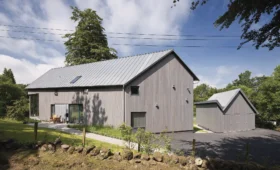
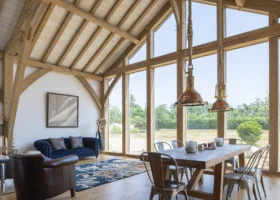
Photo: Mikey Reed
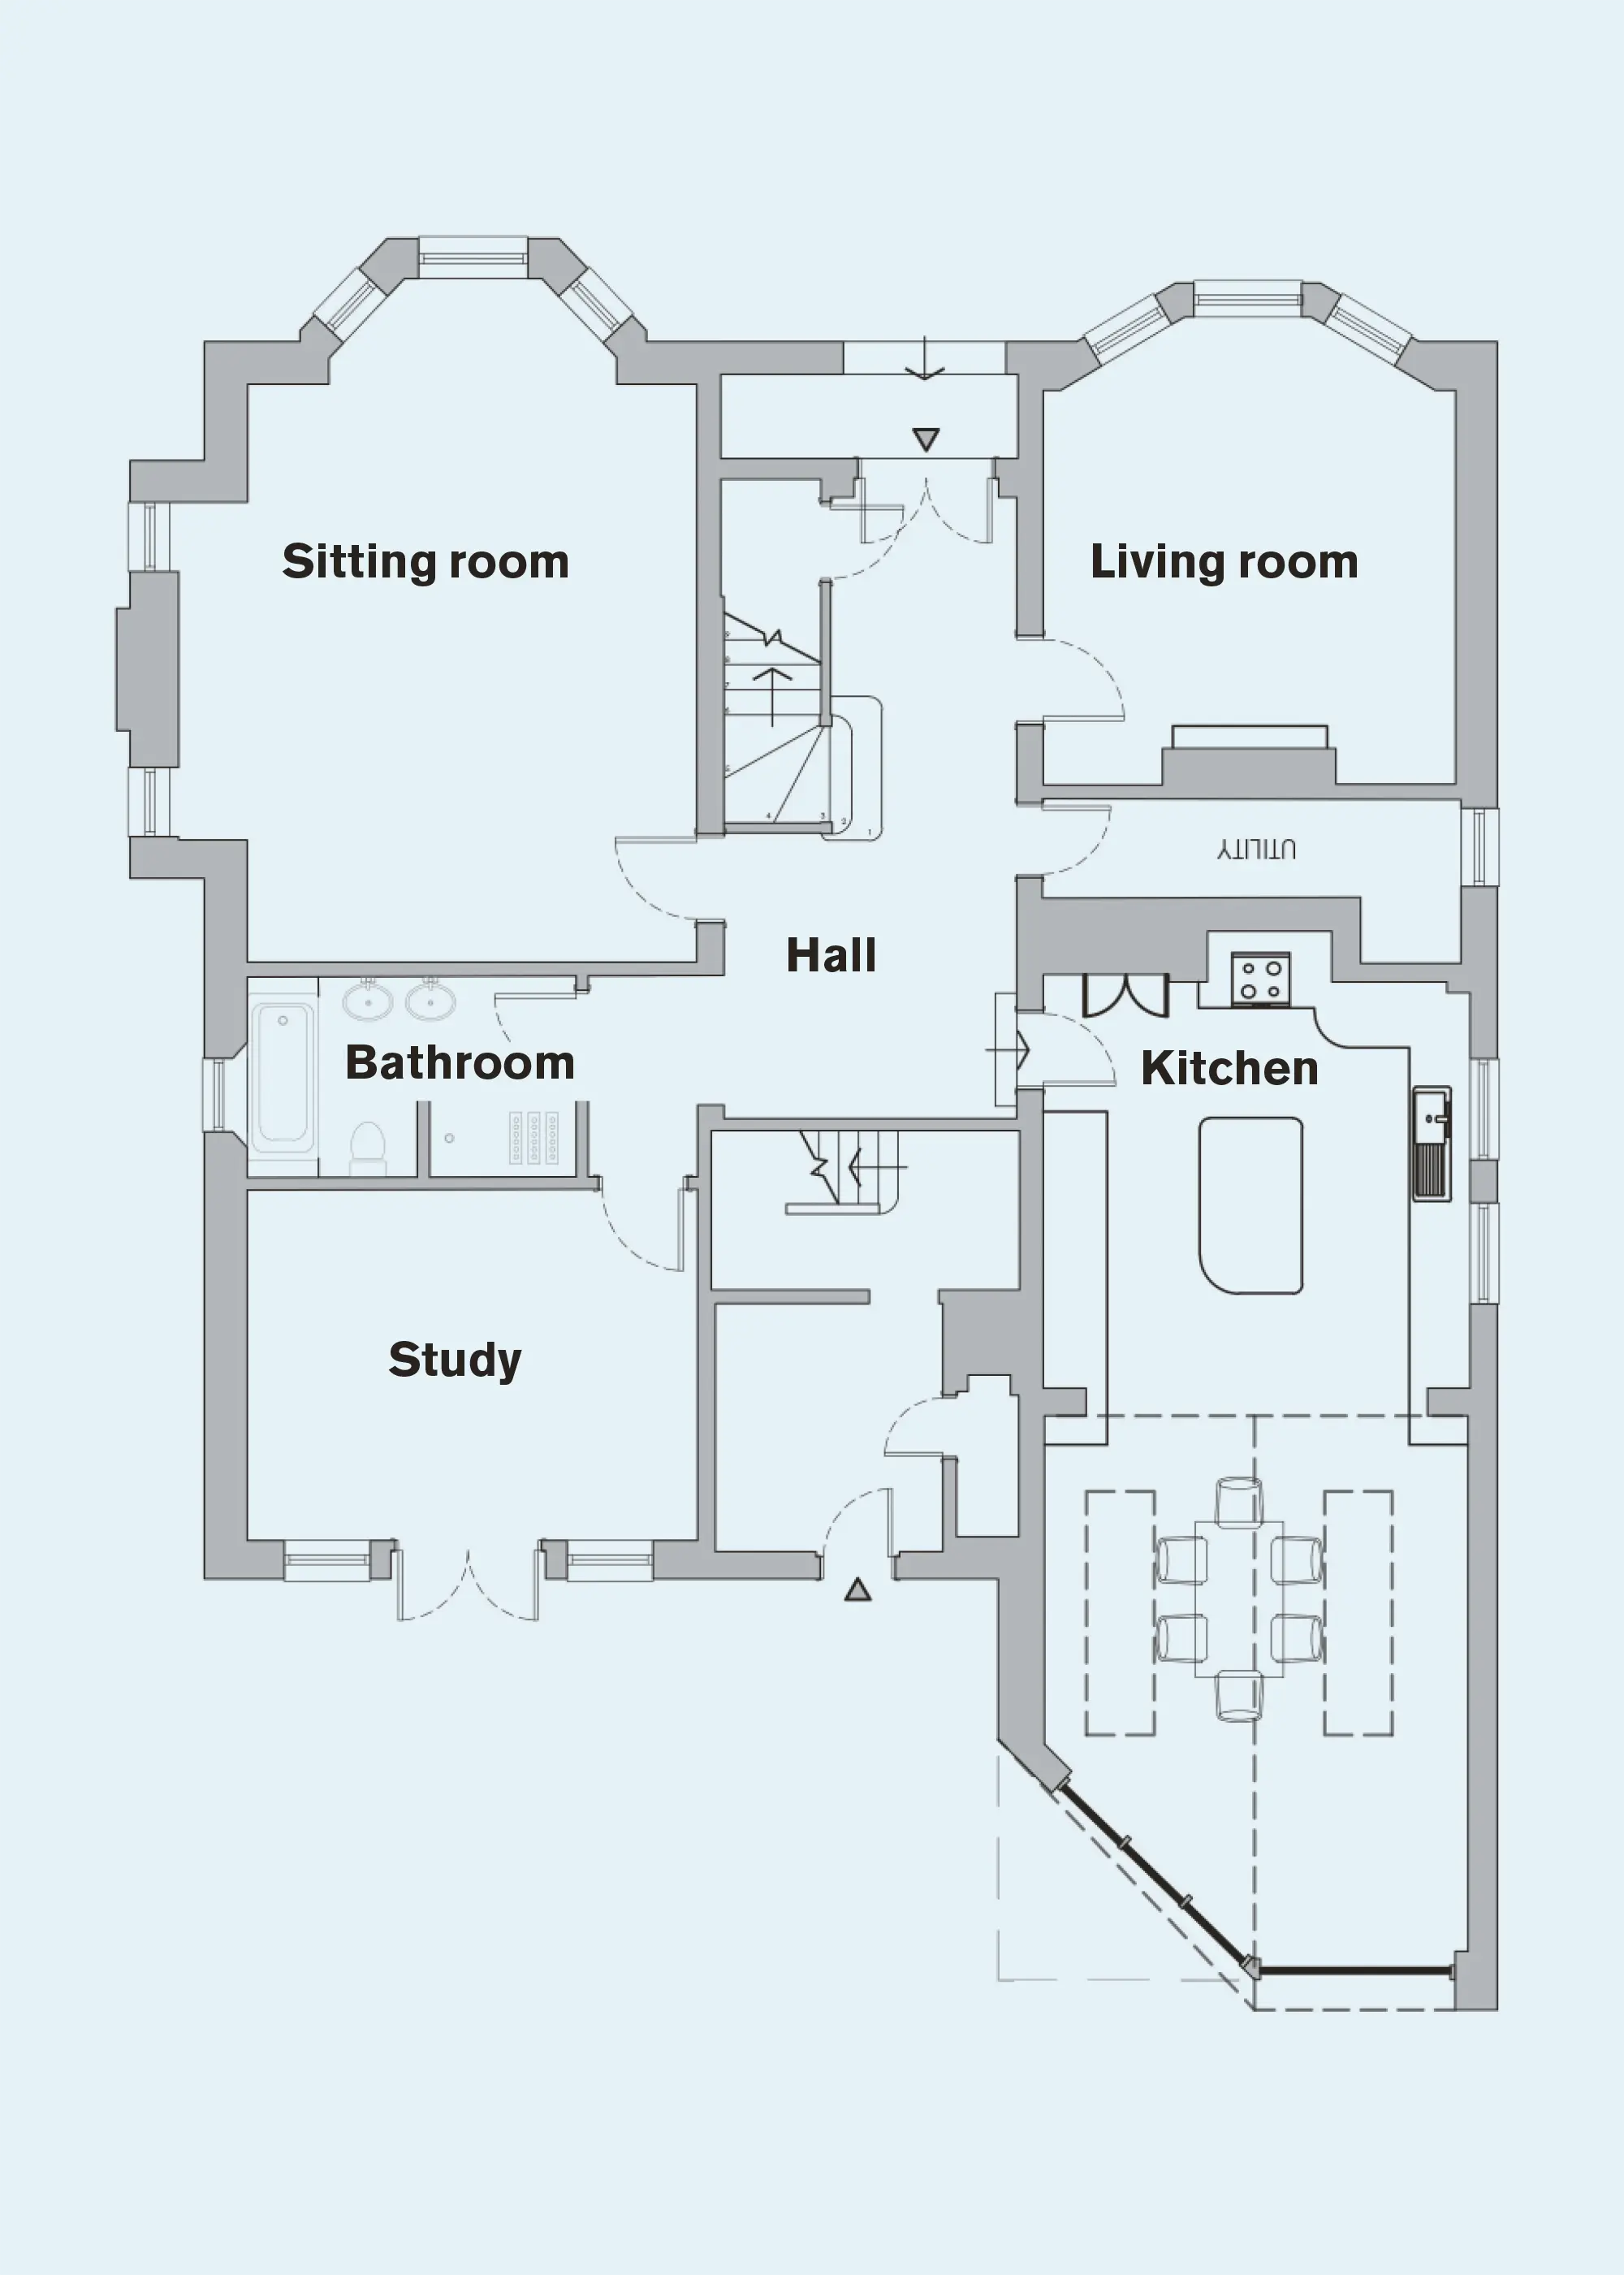
Previously three separate flats with a series of minor extensions at the back, the owners of this property (above) enlisted Coleman Anderson Architects to create a more effective layout and reestablish the home’s connection with the southern garden. They bought the house after the ground and first floor apartments had been reconnected to form one unit.
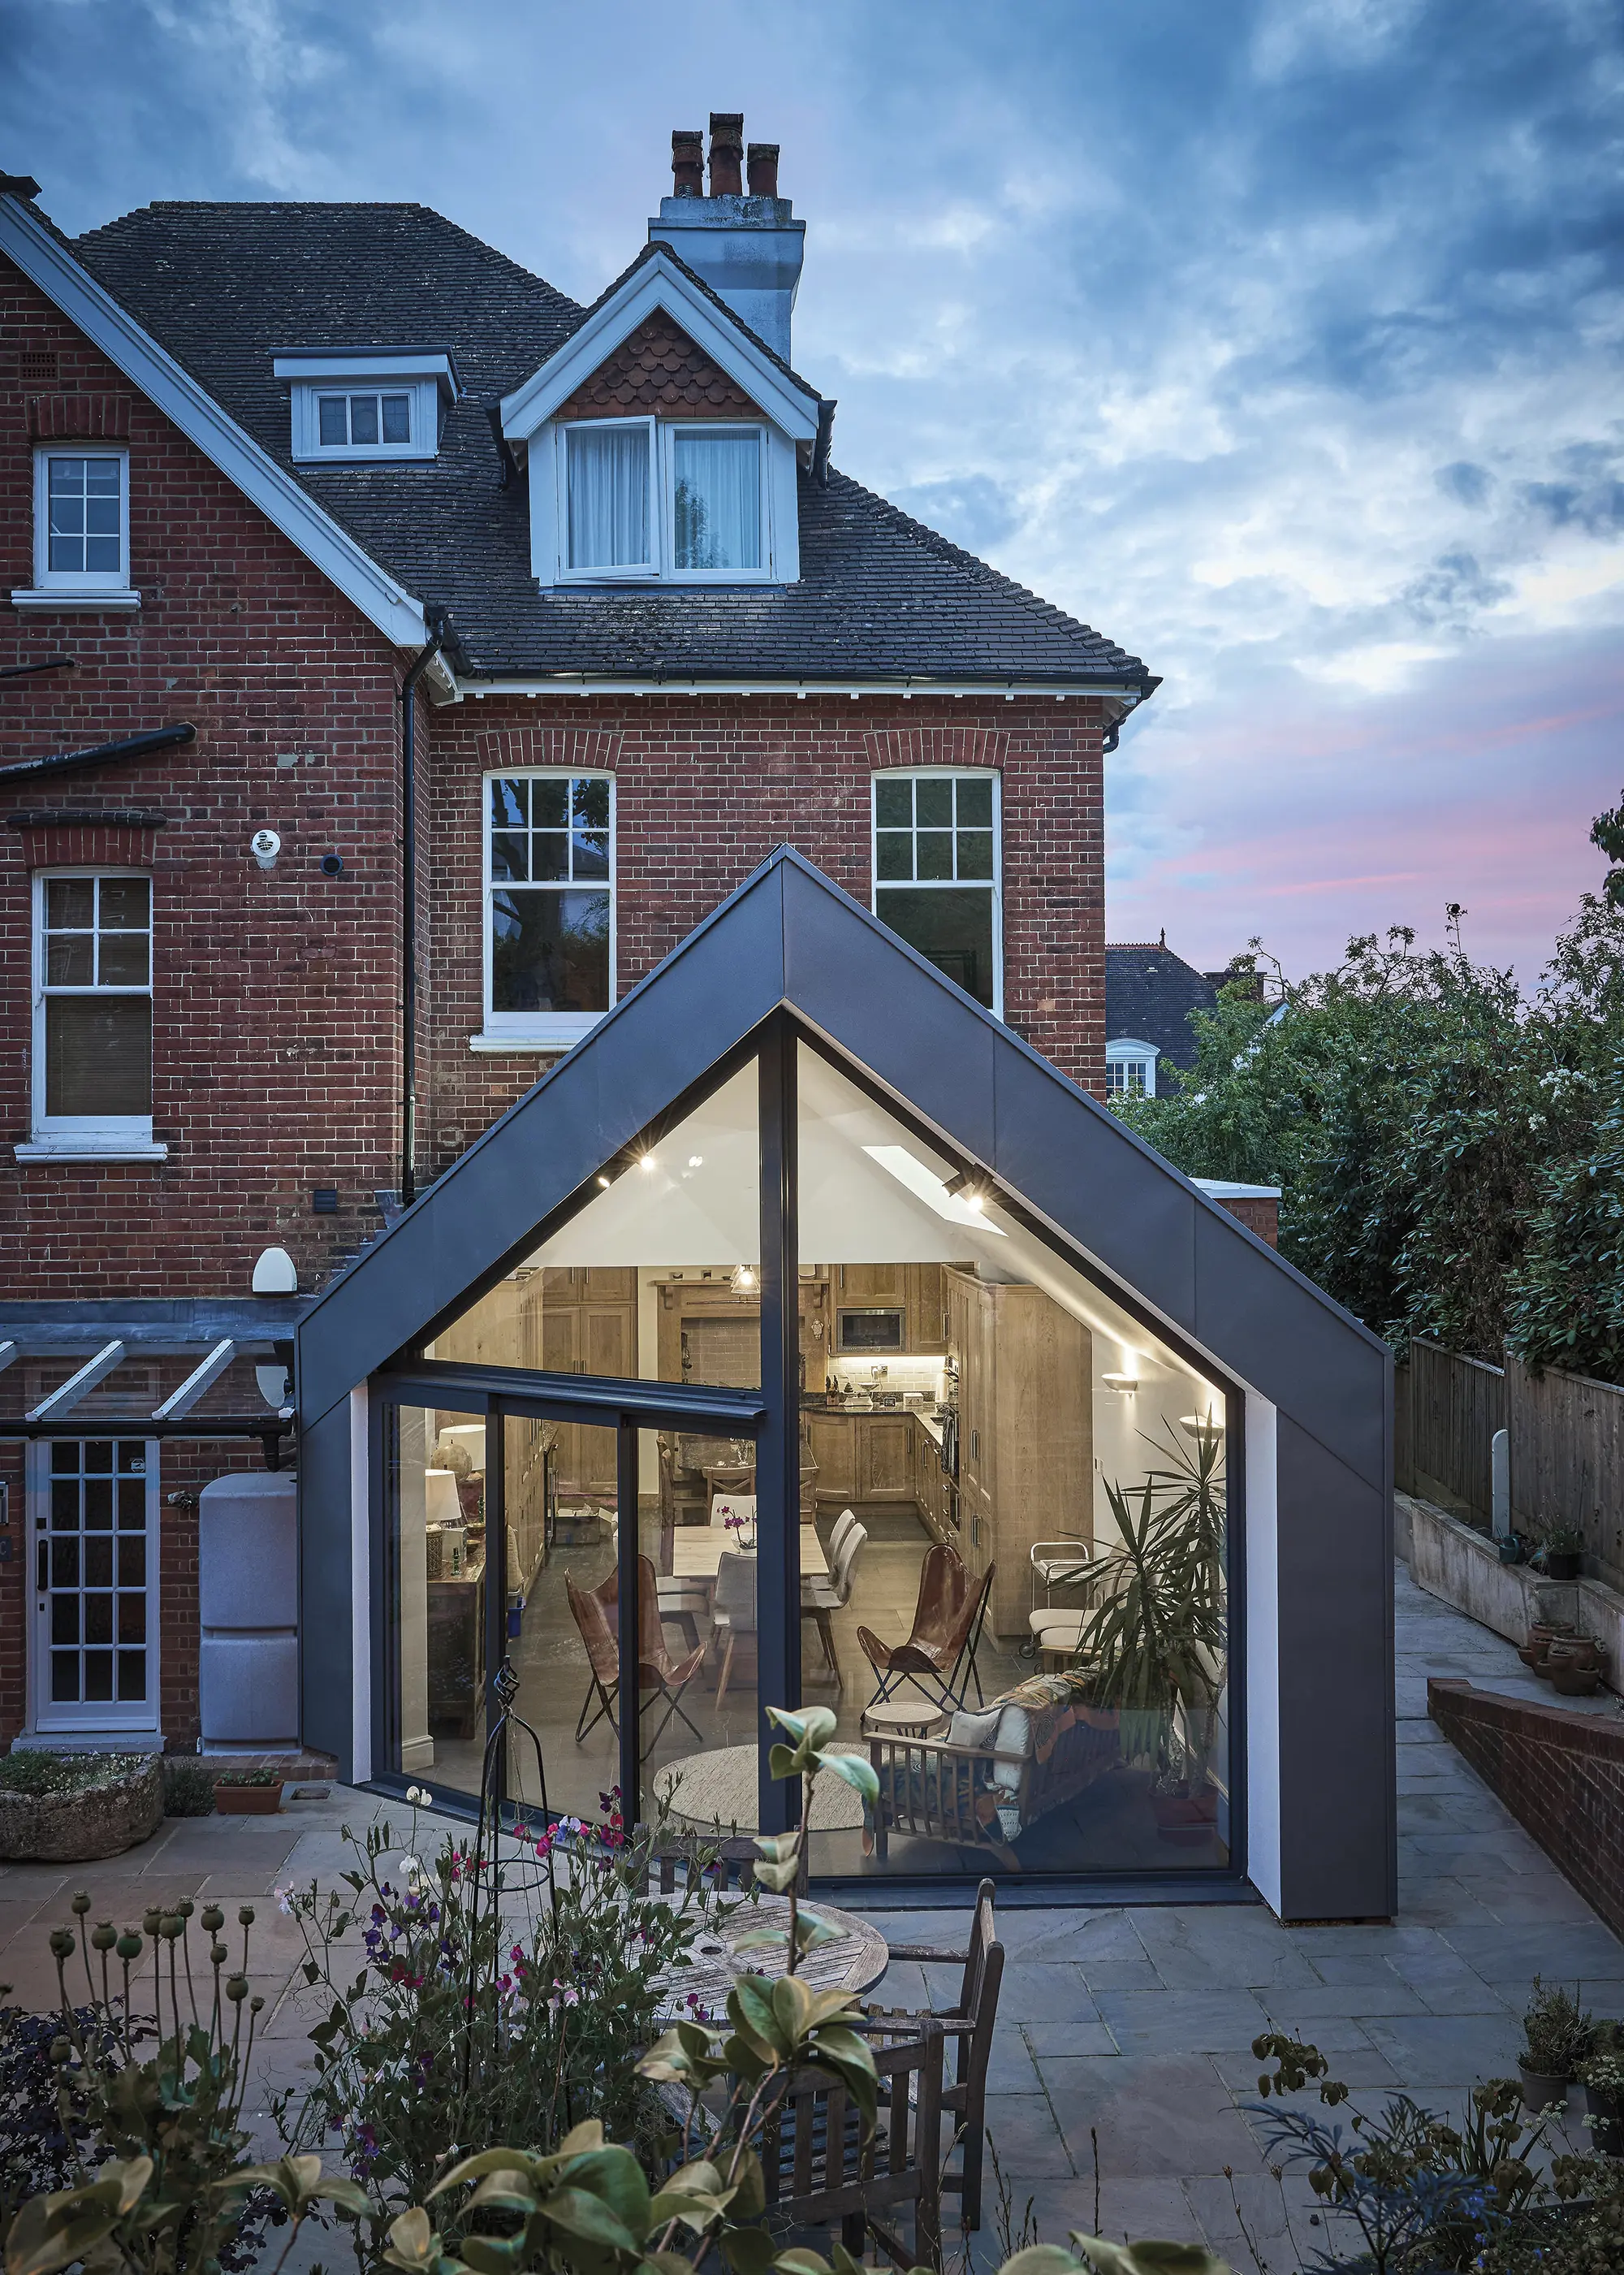
Photo: Mikey Reed
However, the layout of the ground floor and its relationship to the rear garden remained disjointed – with the existing kitchen space located centrally within the lower floorplan, completely cut-off from the outdoors.
Coleman Anderson Architects
The reimagined addition features an eye-catching glazed gable, cleverly angled to make the most of the site’s views. The new space houses an open-plan kitchen, living and dining area, without extending across the full-width of the house.
L-shaped structures can add a significant amount of floor area to your home and make effective use of what is often redundant space down the side of your property. Typically combining a side infill and rear extension, they’re a great solution for adding to your footprint without extending as far out to the rear and taking up garden space.
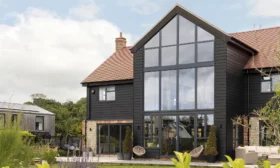
If you have a larger plot with great vistas from multiple angles, a wraparound structure can open up access to your surroundings, revealing excellent sightlines and cross views. Plus, this configuration is ideal for zoning your space clearly, using the structure itself as a natural divider.
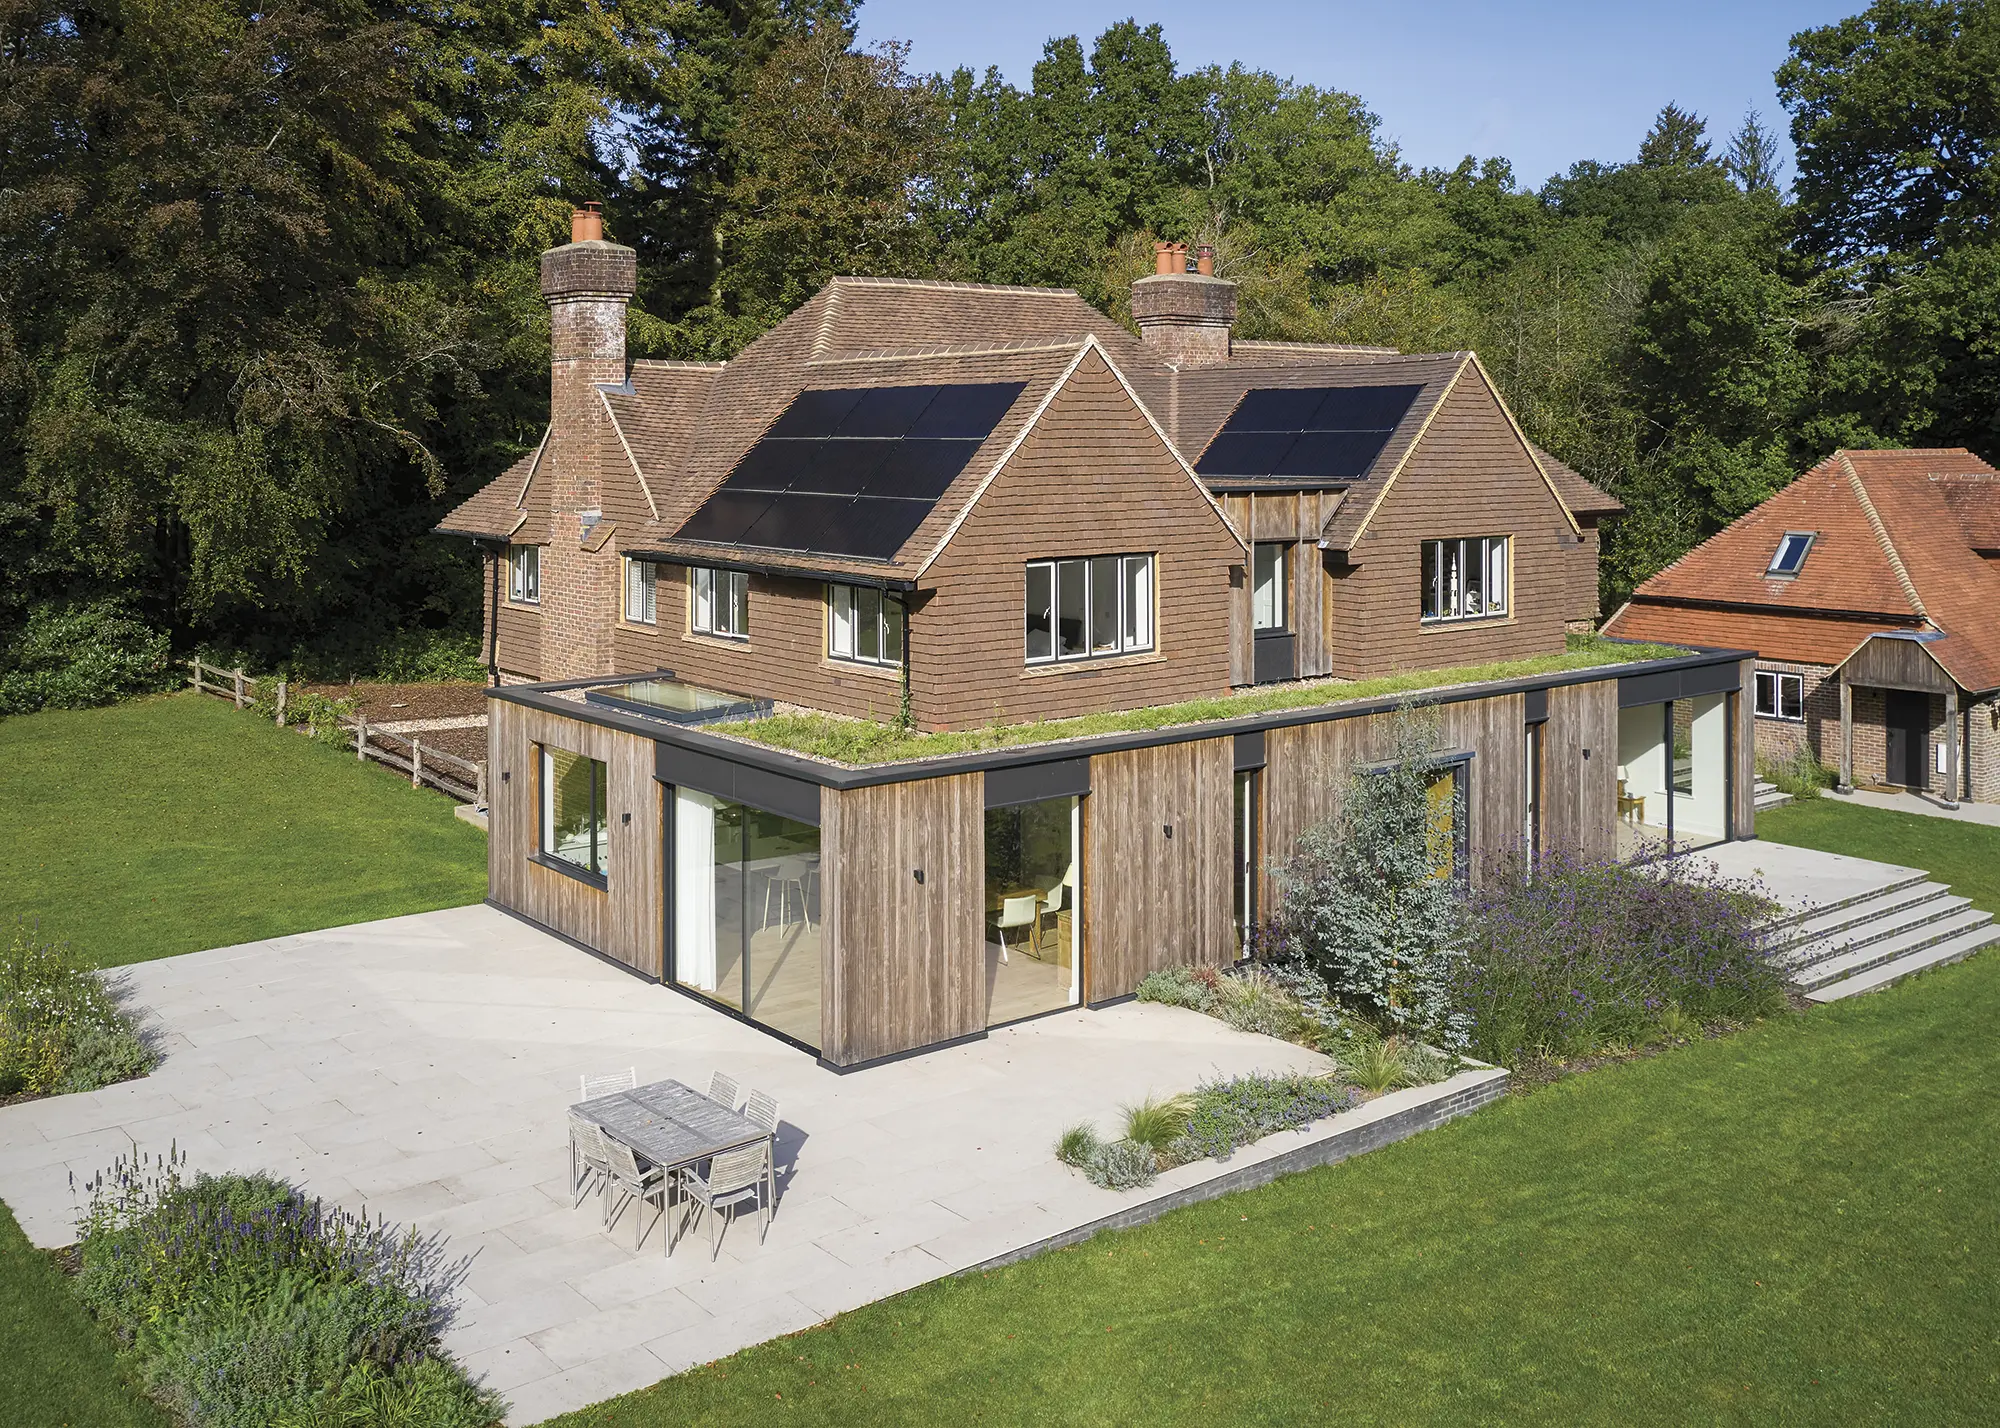
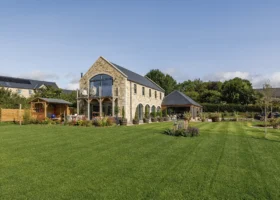
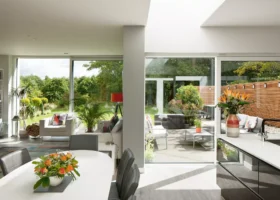
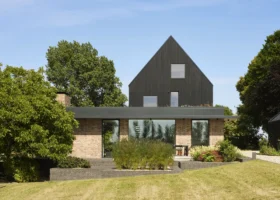
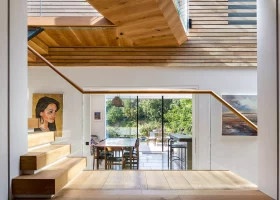
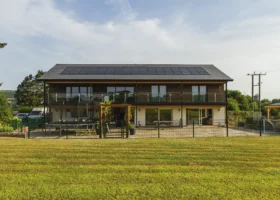
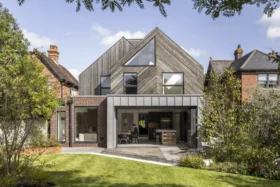
Photo: Richard Chivers
Designed by Adam Knibb Architects, this sympathetic extension (above) seamlessly wraps around the eastern and southern facades of the main property. The new space accommodates a series of open-plan living areas that flow seamlessly into one another – with a playroom, living room and kitchen/dining area all in one place.
Adam Knibb Architects
The first-floor extension mirrors the house’s existing gable, with a timber-clad link situated behind it, which maintains the hierarchy between old and the new. Ample glazing and sliding doors connect the inside with the picturesque South Downs, while also flooding the space with natural light.
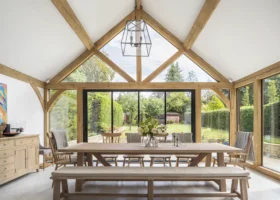
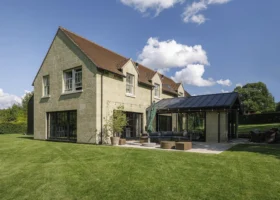
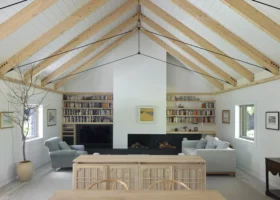
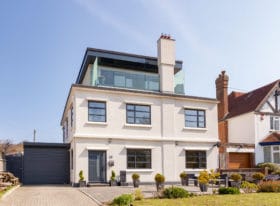
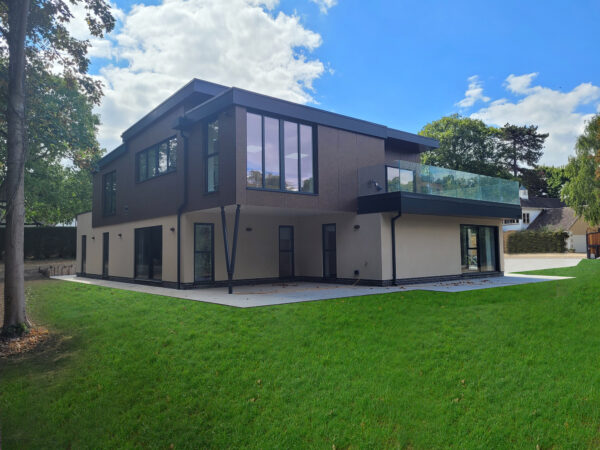
A two-storey configuration allows you to double up on added square footage without taking up the extra outdoor space. A double-height extension can be built to the side, rear or even front of your house, completely transforming the way you use your property as a whole, and increasing flexibility in your layout. It’s a great solution for introducing a spacious shared or open-plan zone at one level, plus extra accommodation above or below, while taking on a singular project.
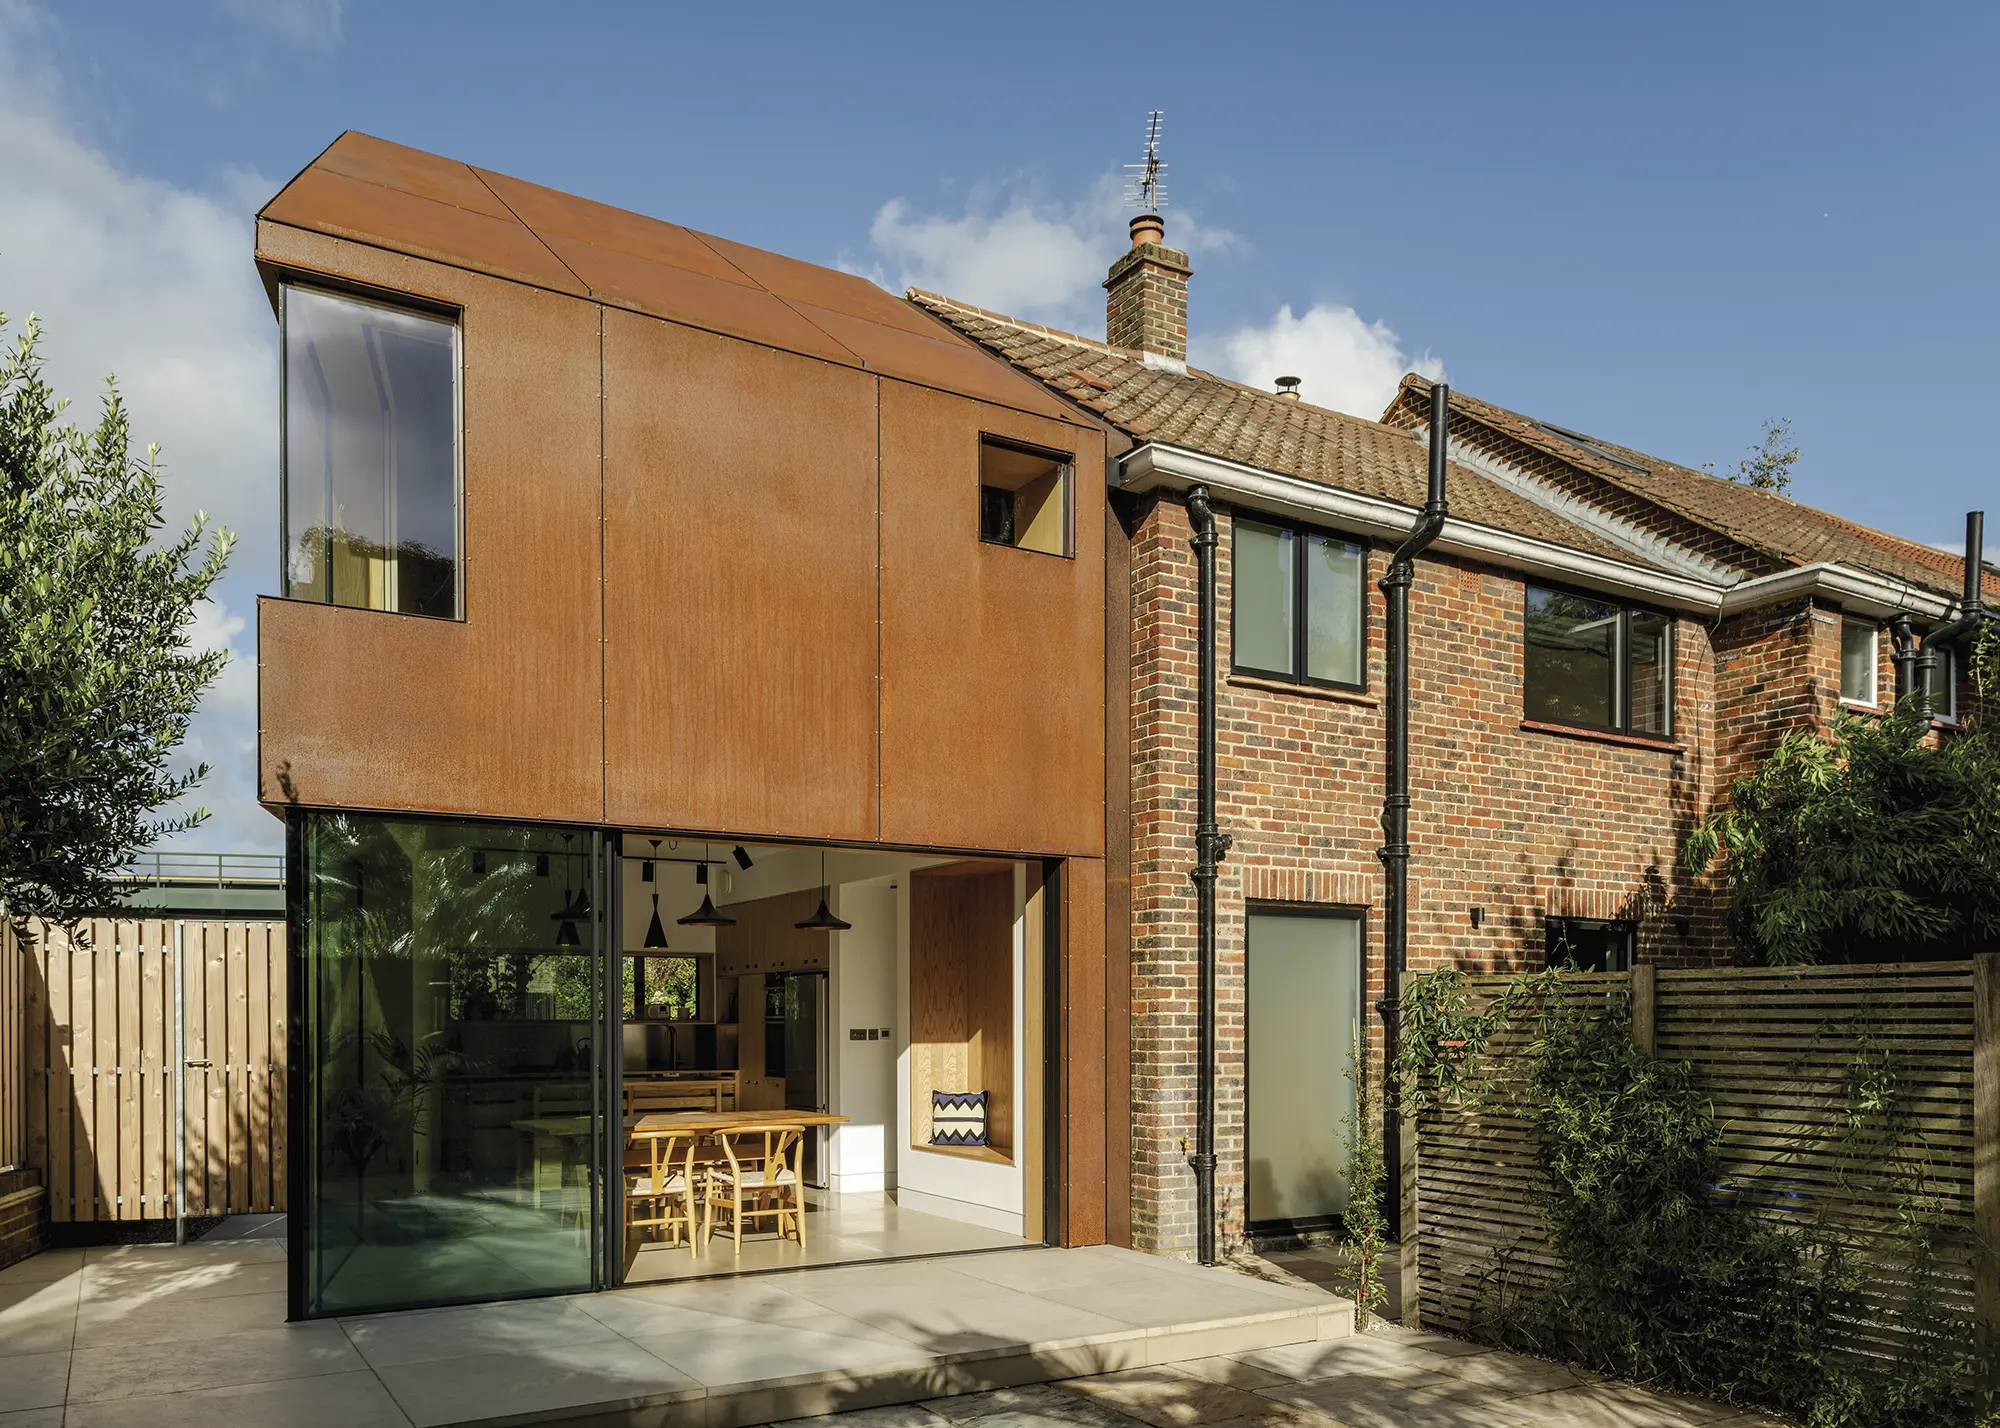
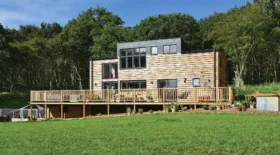
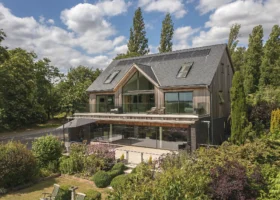
Photo: French + Tye
Careful consideration of how your new and existing rooms will connect is key to a successful design – this may mean rethinking your entire floorplan in order to make best use of the added space. The two levels don’t have to be equal in size – you may not require the same footprint upstairs for say, one extra bedroom or a new study, as you’d like for a new, open living space on the ground floor.
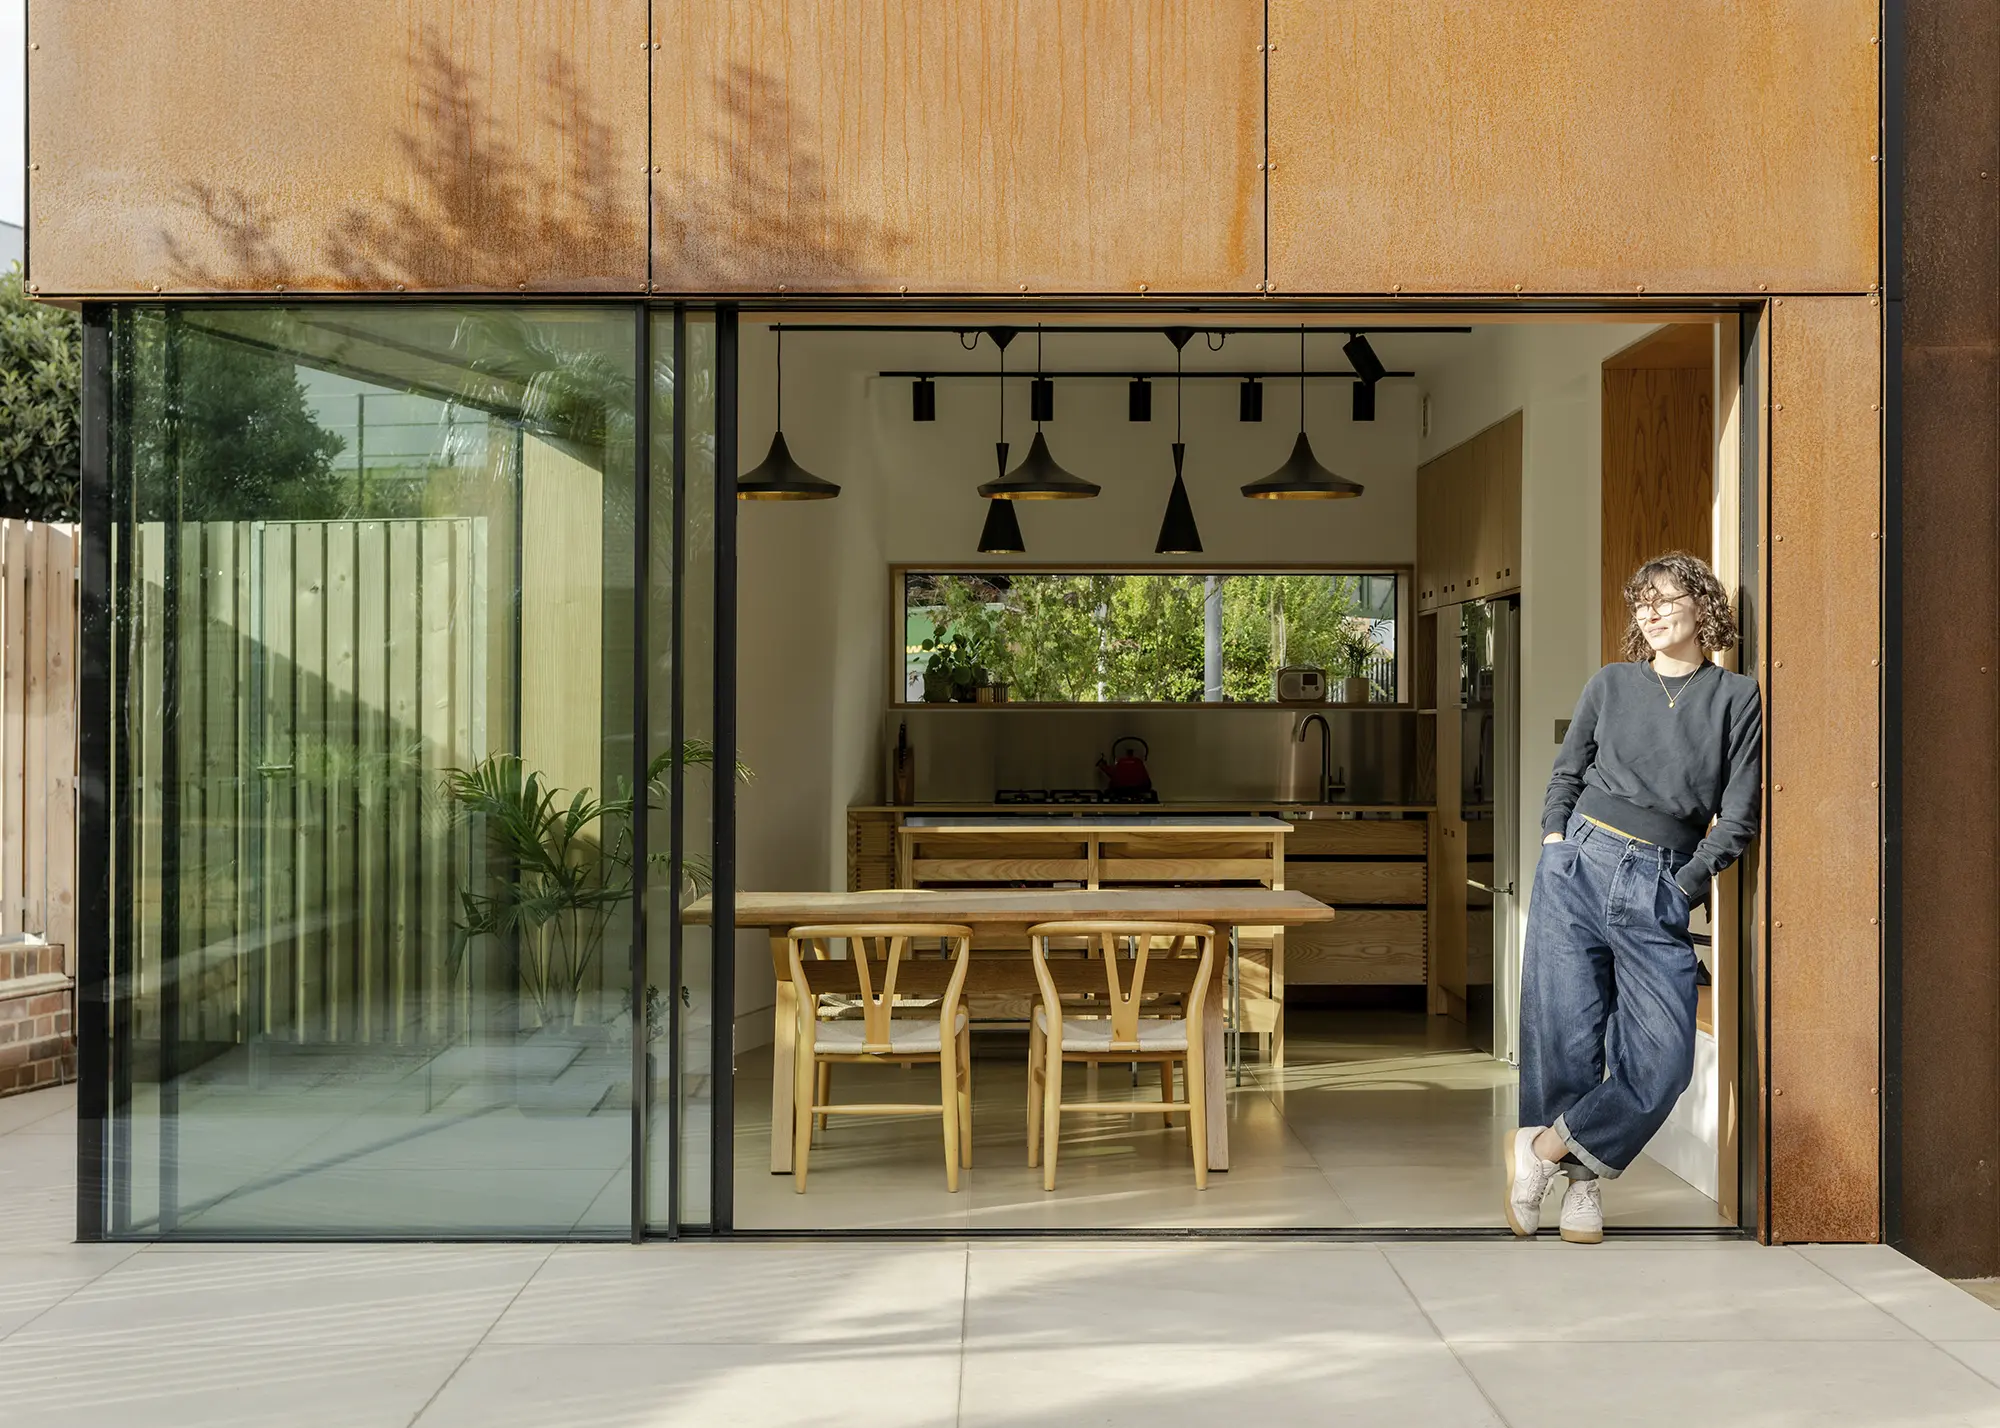
Photo: French + Tye
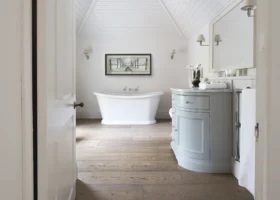
This stunning example of a full-height, two-storey addition (above) to an end-of-terrace home was designed by Studio on the Rye. Located within a conservation area, the project created a new kitchen/diner, utility room and snug on the ground floor, plus a generous master bedroom with an ensuite shower room and walk-in wardrobe above.
Studio on the Rye
To mitigate the loss of some garden space, large sliding doors create two fully-glazed walls around the open-plan zone at ground floor level, providing a seamless transition between living spaces and the outdoors.
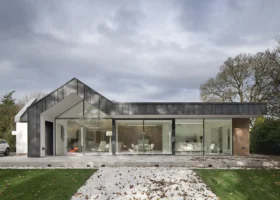
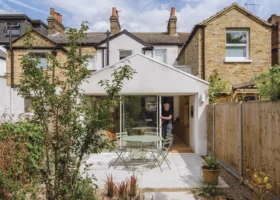
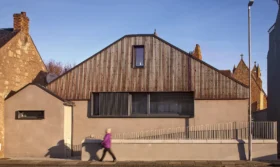
Often seen on period properties, terraced and semi-detached homes, a side return extension is a great way to make the most of typically unused, or awkward space between buildings. It’s ideal for increasing the footprint of your ground floor and introducing light into existing rooms, with a relatively modest addition that won’t take up much of your useable outside space.
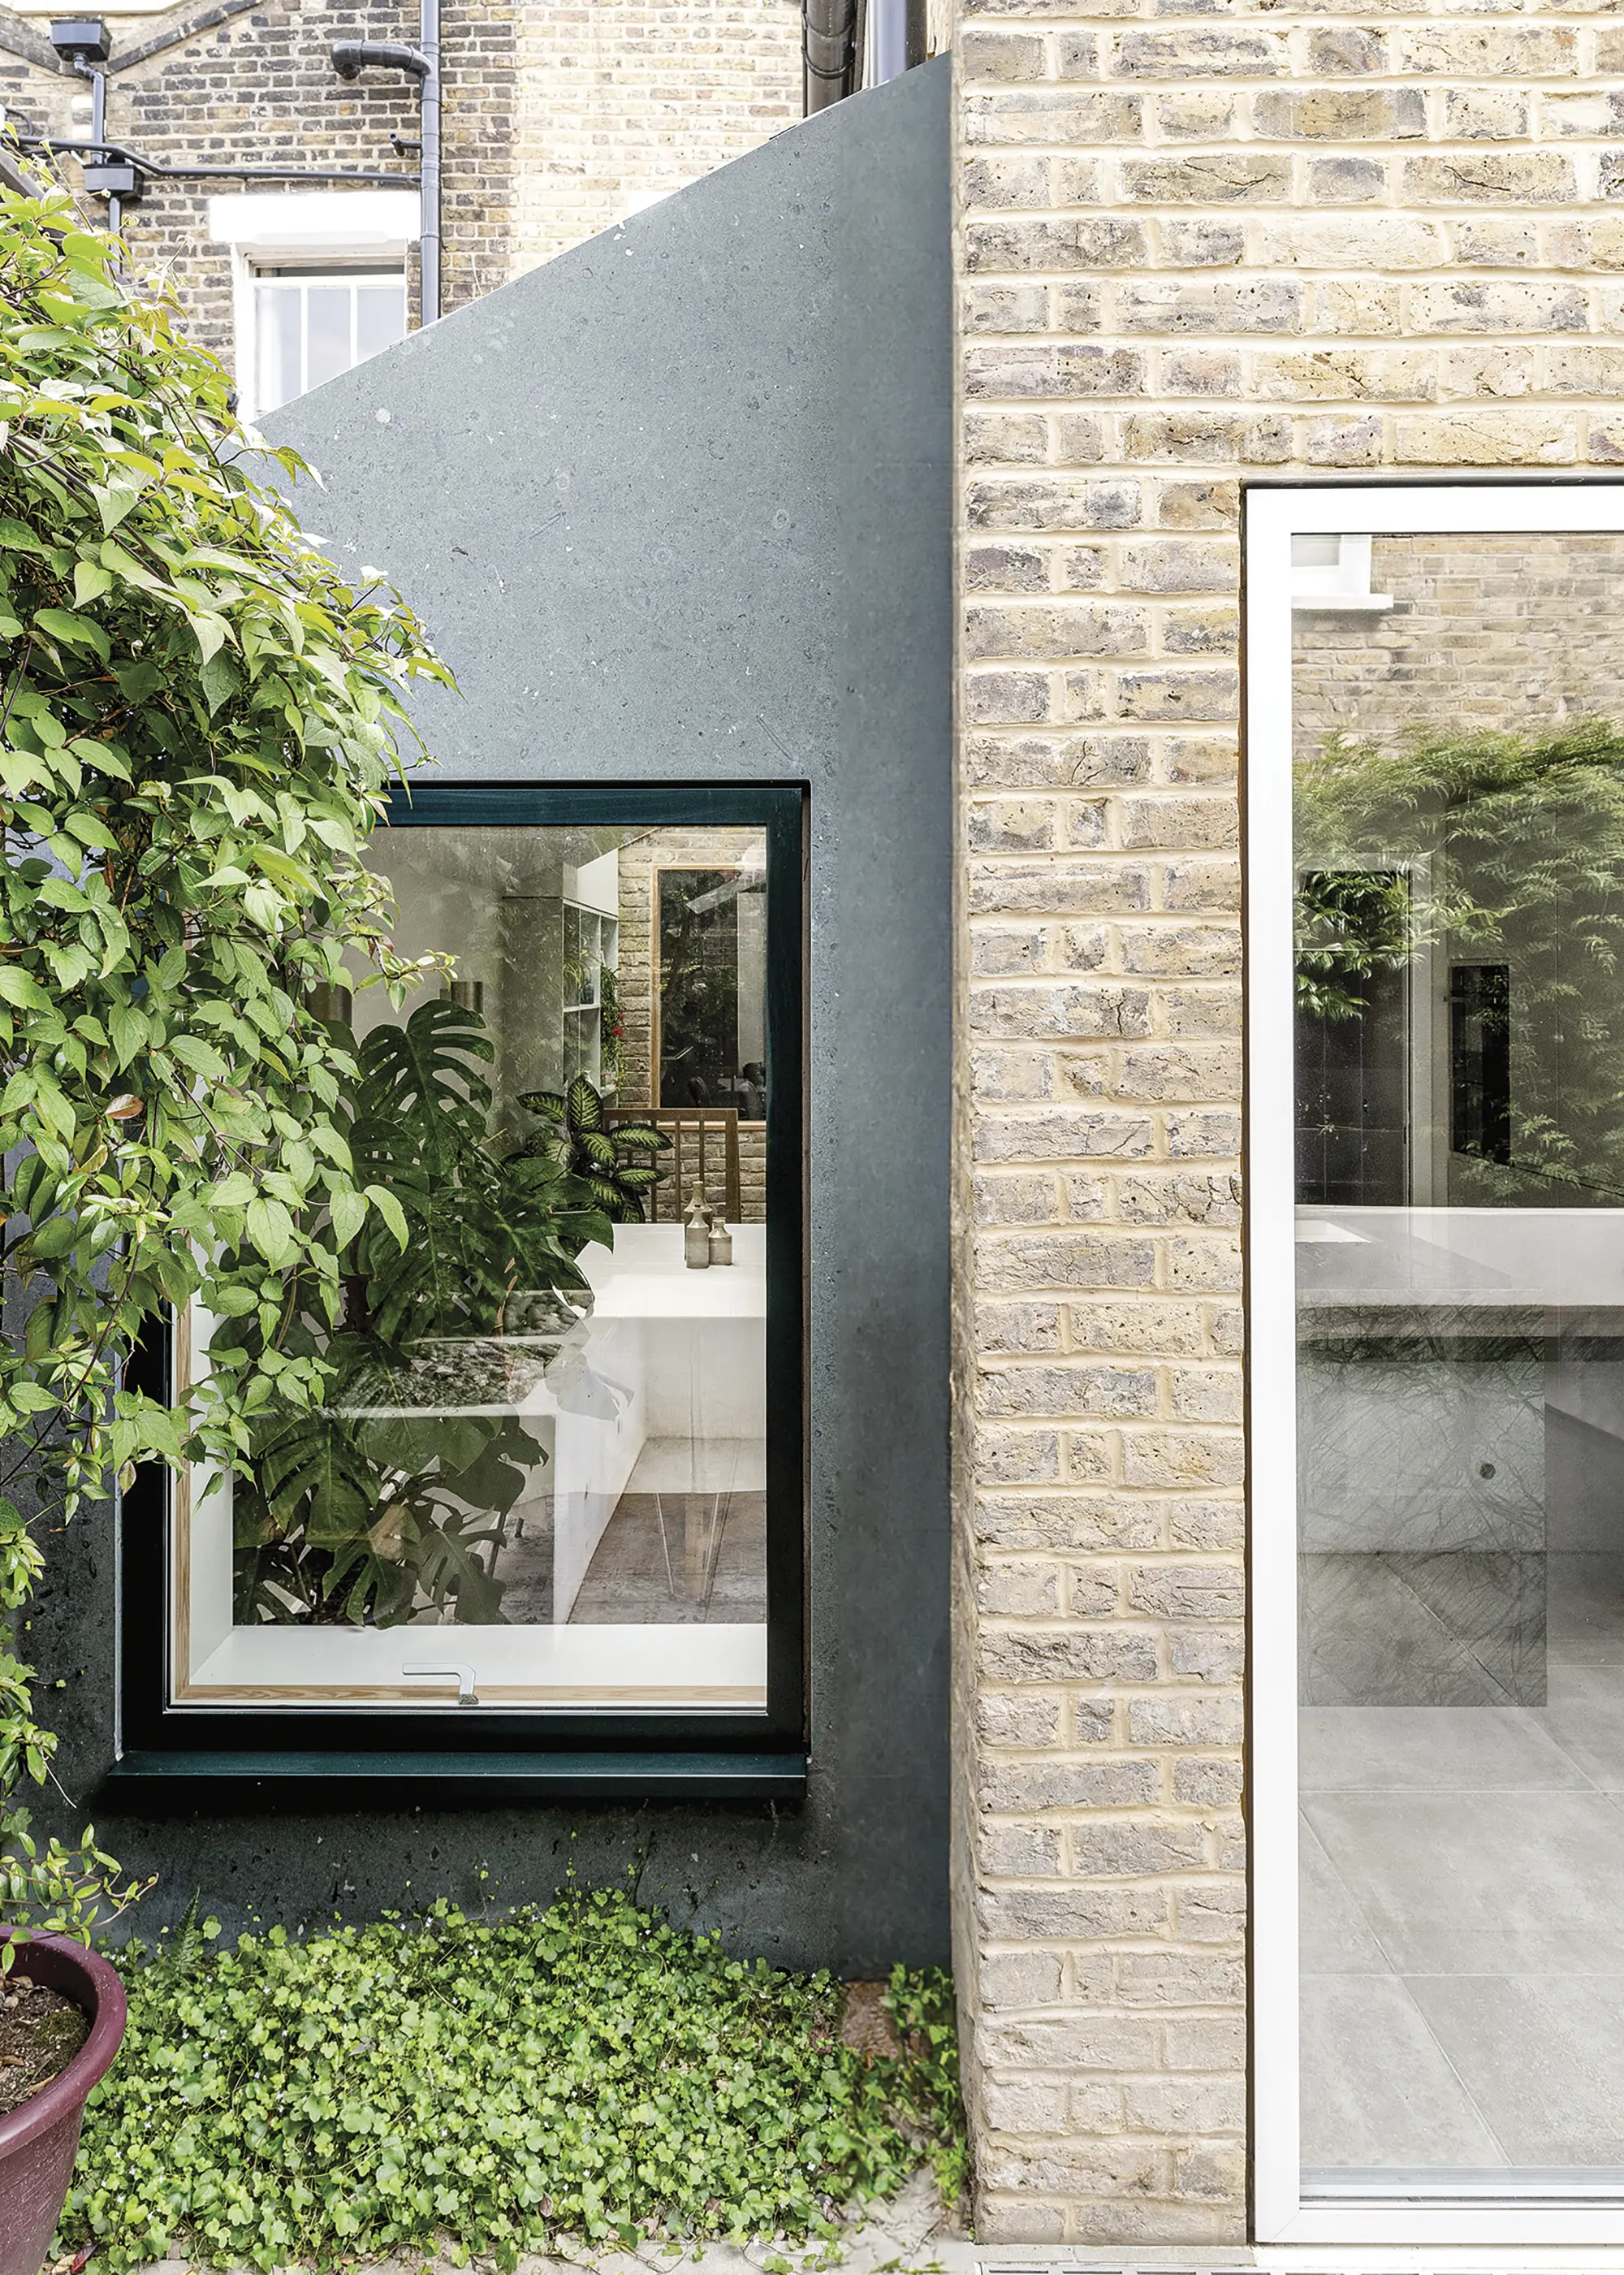
Photo: David Barbour
Typically, a side return extension will expand on an existing kitchen or living area. The size of the addition will vary depending on your property, but typically the build will allow space for a kitchen island, a new snug room or zoned-off dining area.

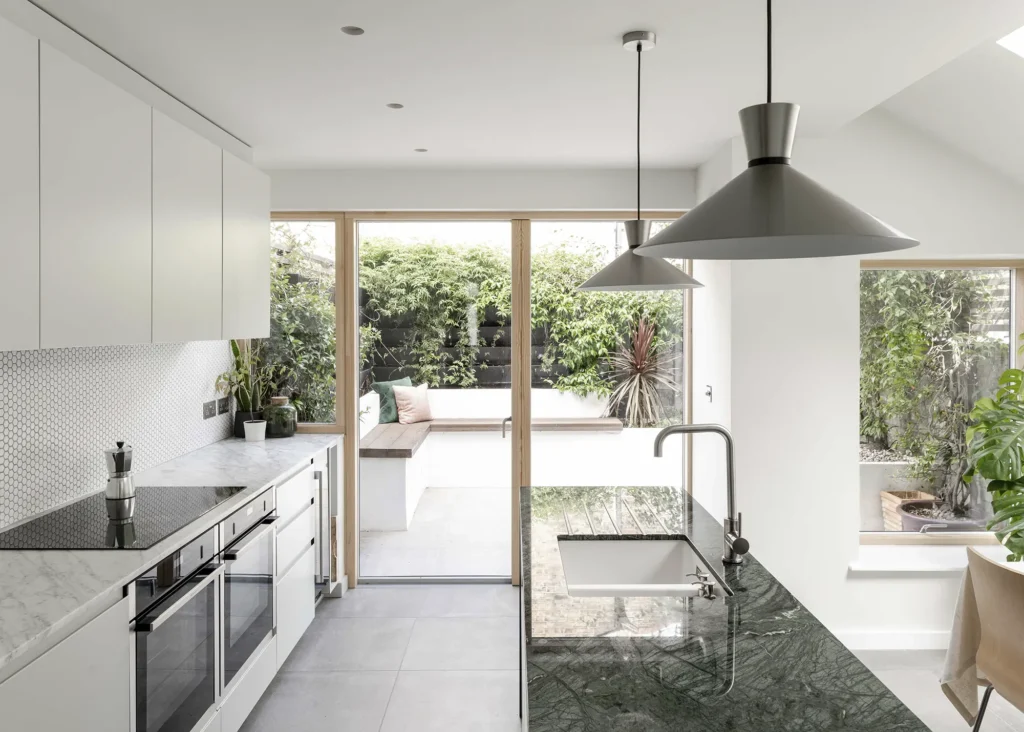
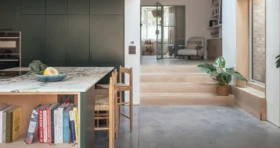
Extending to the side can effectively open up your whole lower ground to the garden and make your floorplan feel more open, without taking on a substantial extension project or completely reconfiguring. Archer + Braun Architecture designed this contemporary side return addition (above) to a terraced property in a conservation area. The modest structure provided just the right amount of space for a new kitchen and dining room.

Making the most of a compact footprint and reducing the size of the kitchen slightly, a wet room and utility/bike cupboard was also incorporated, cleverly tailoring the layout to suit the homeowners’ day-to-day lifestyle.
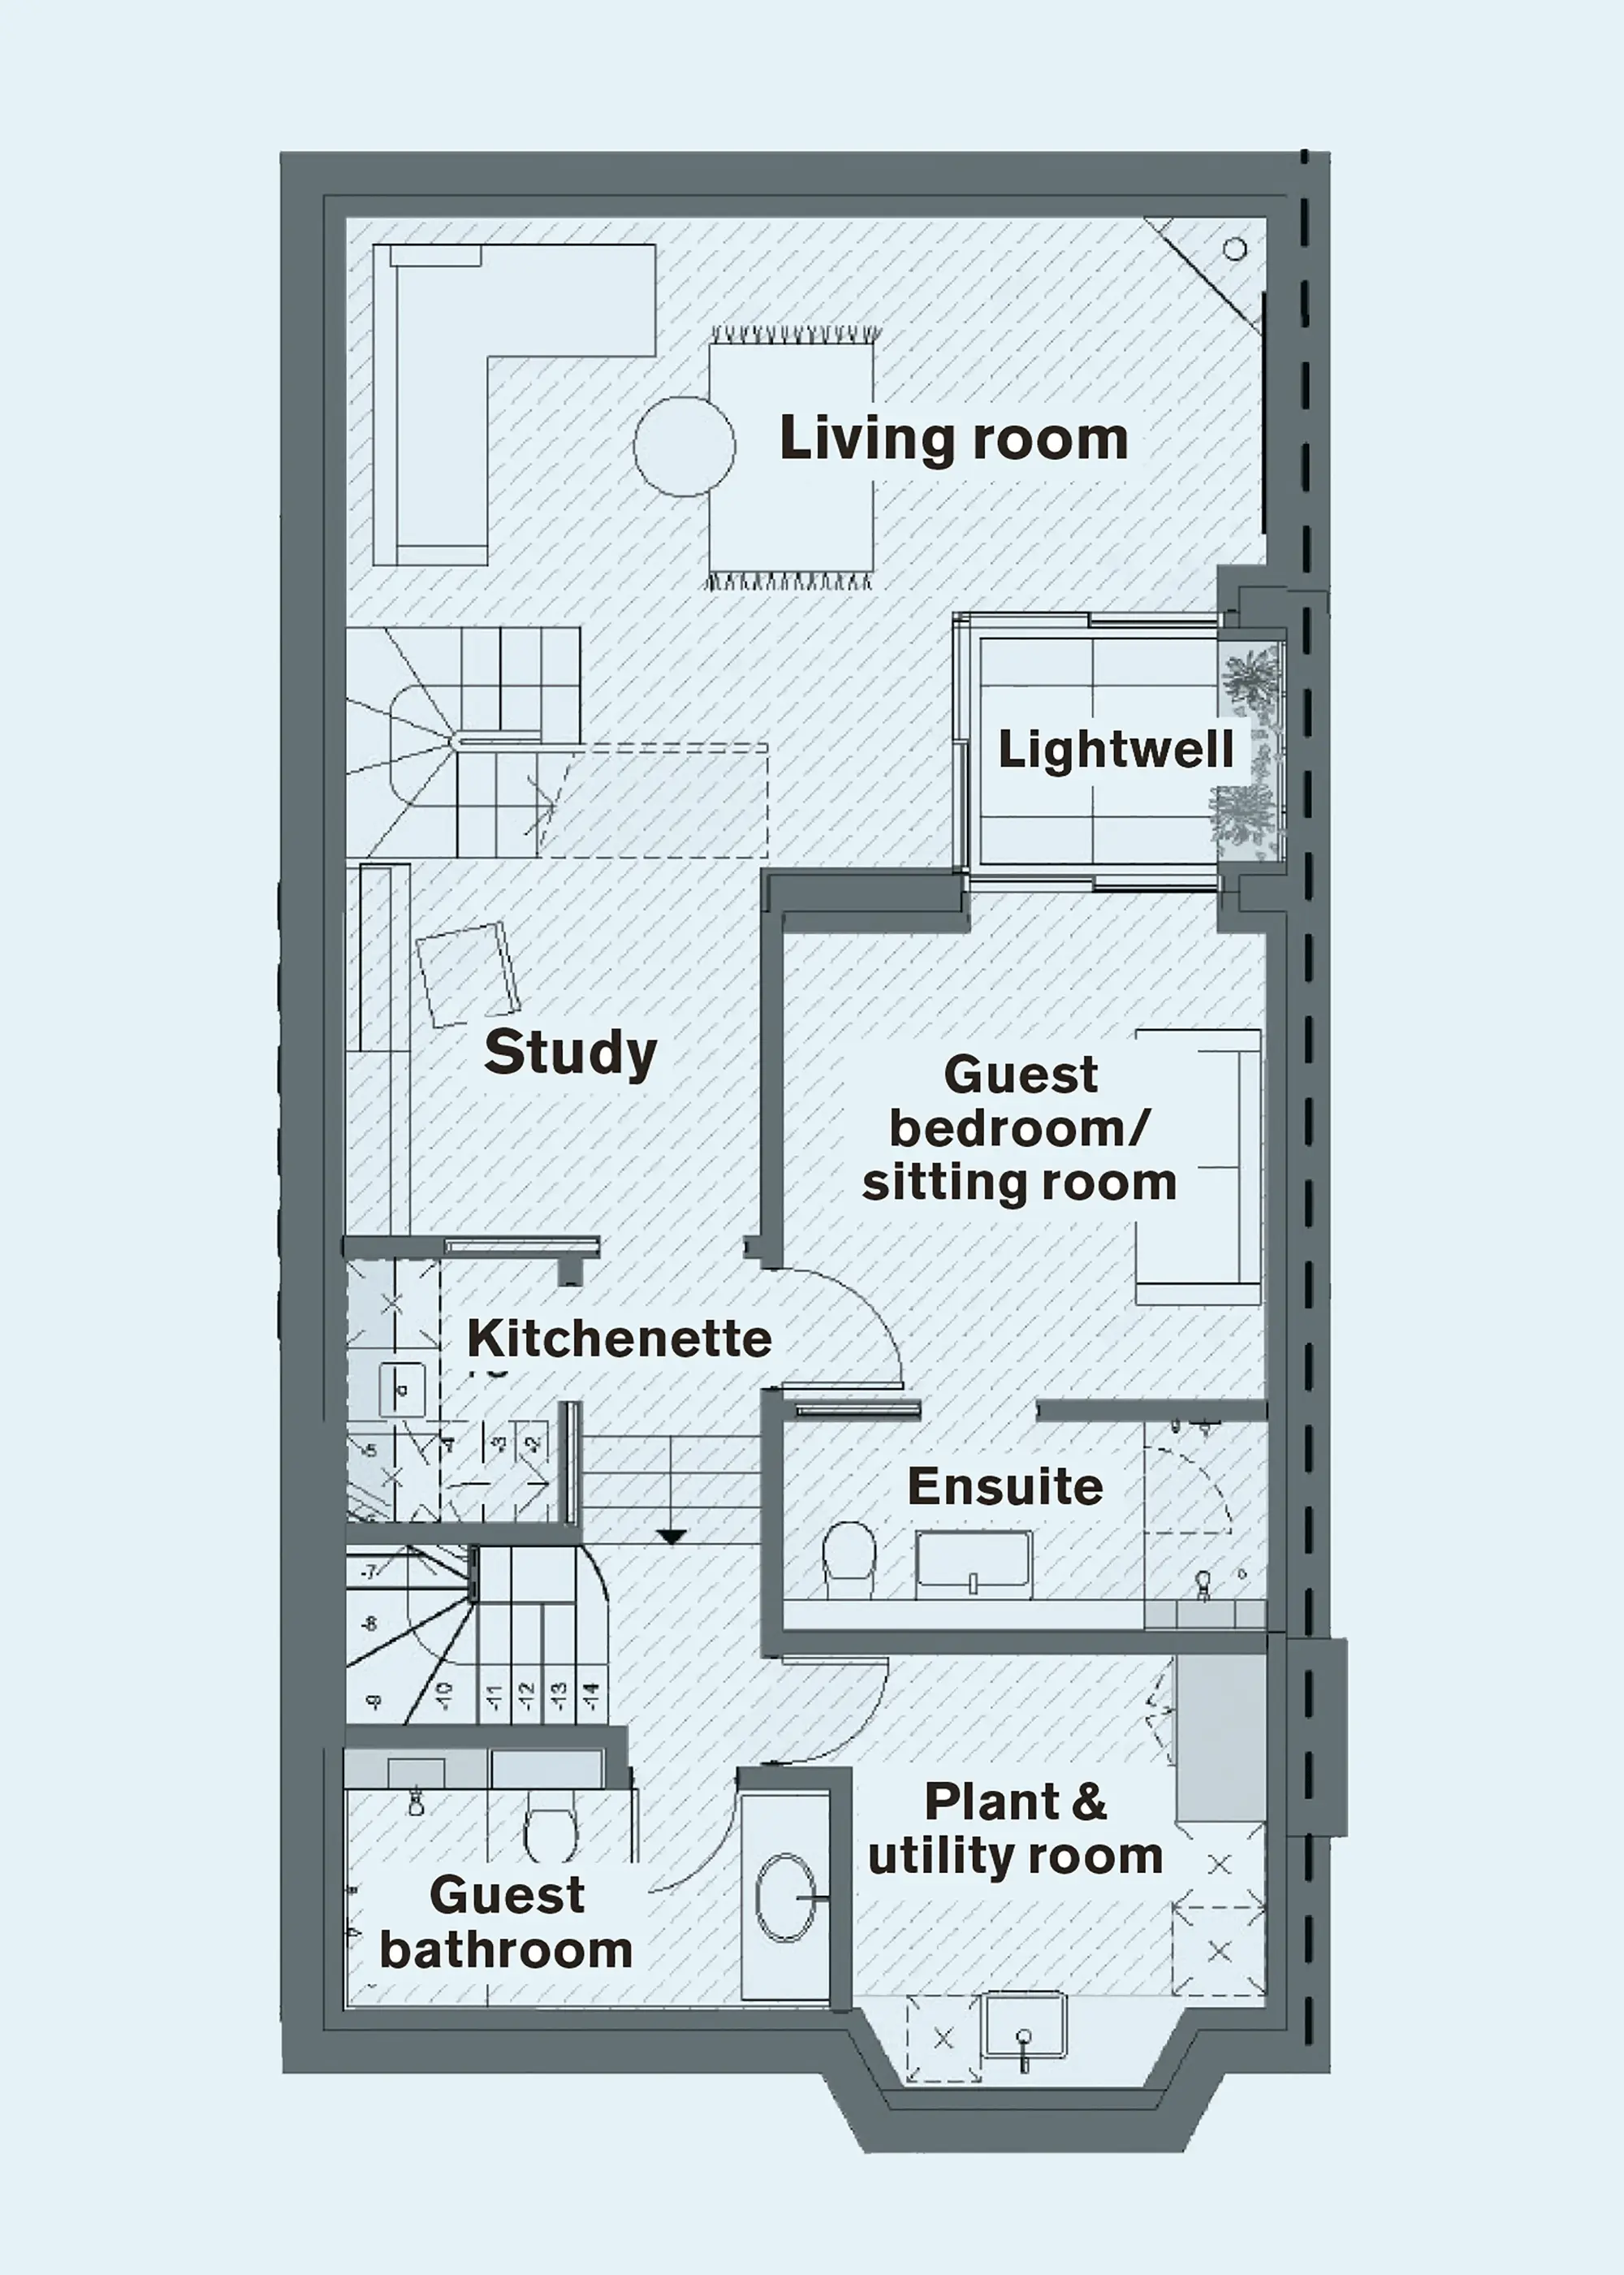
If you don’t have suitable outside space or a loft area to convert, digging down with a basement extension is a great way to add usable living area to your home. Thanks to natural sound insulation from being surrounded by solid walls and subsoil, this option is great for creating games rooms, gyms, home cinemas and even swimming pools, or simply a secluded zone for relaxing.
Basement extension or conversion floorplans require careful consideration, especially in terms of staircase placement and ensuring access to sunlight in the form of lightwells or a well-designed artificial lighting scheme.
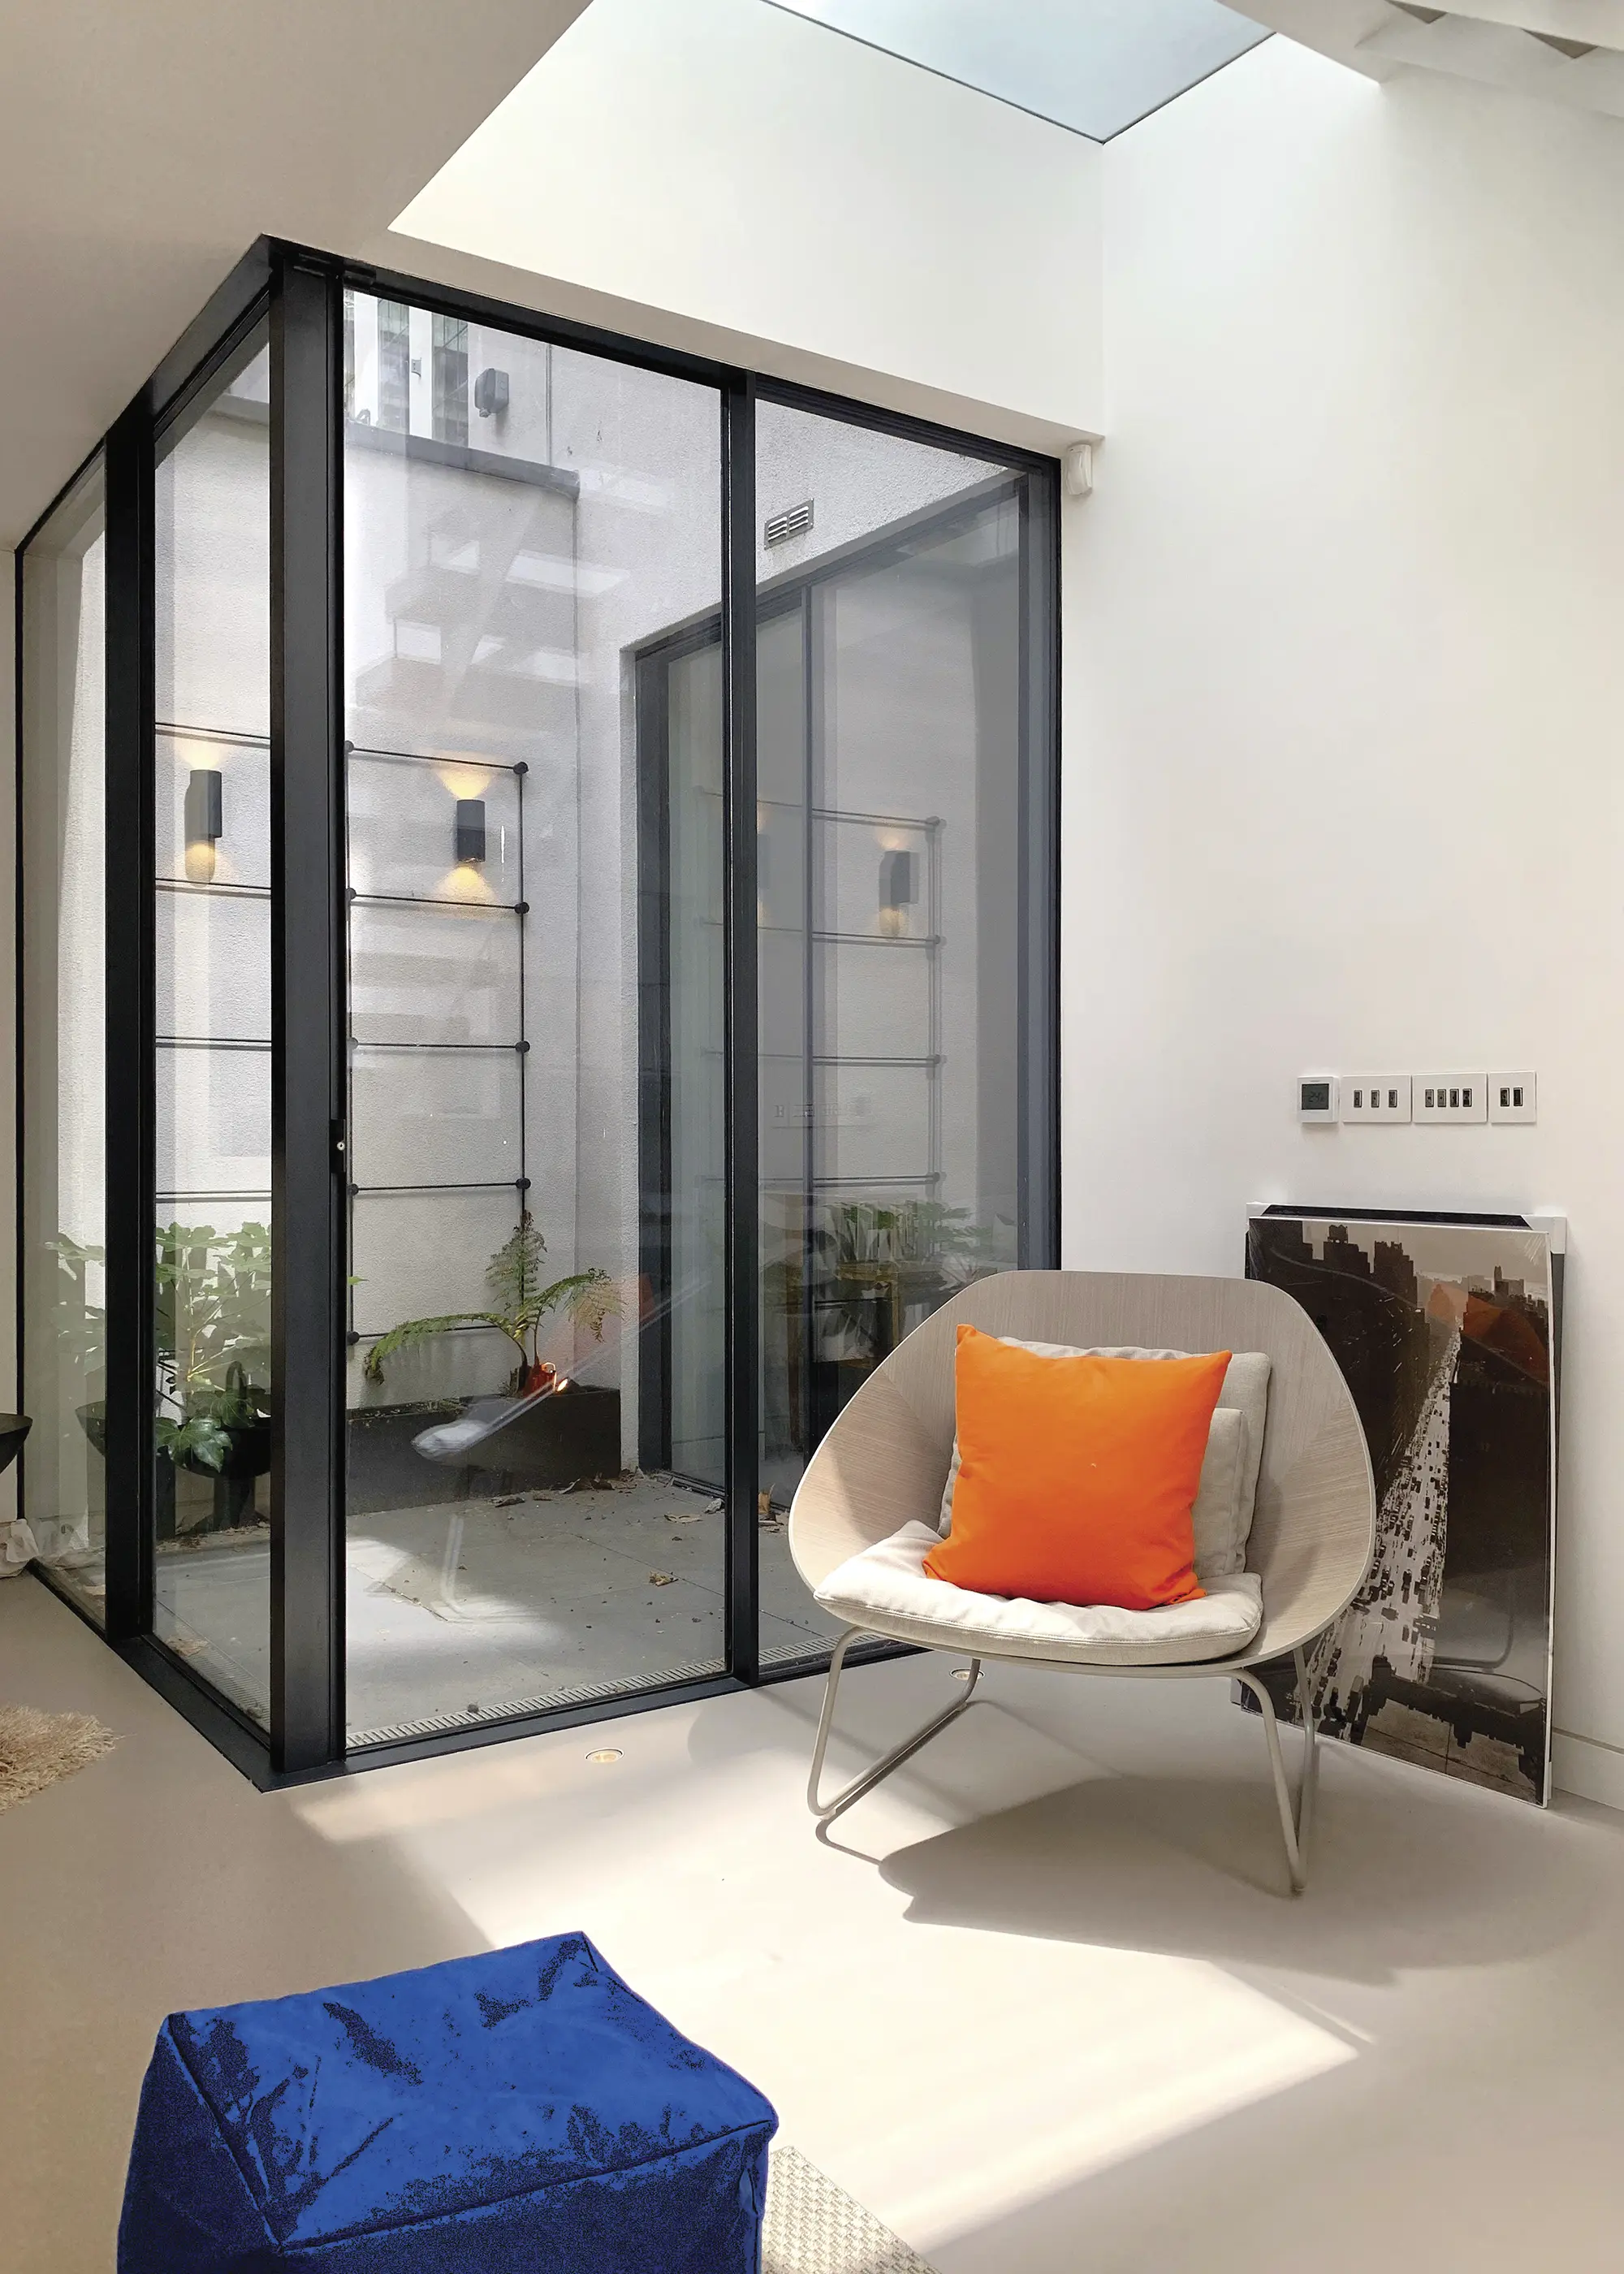
Photo: 2pm Architects
Maintaining a connection with the rest of the house is also vital. Ideally the staircase will be immediately below the ground-to-first-floor flight and lead to the hallway, providing a safe and direct route out of the basement. Locating it elsewhere can eat into the available space in your current rooms.
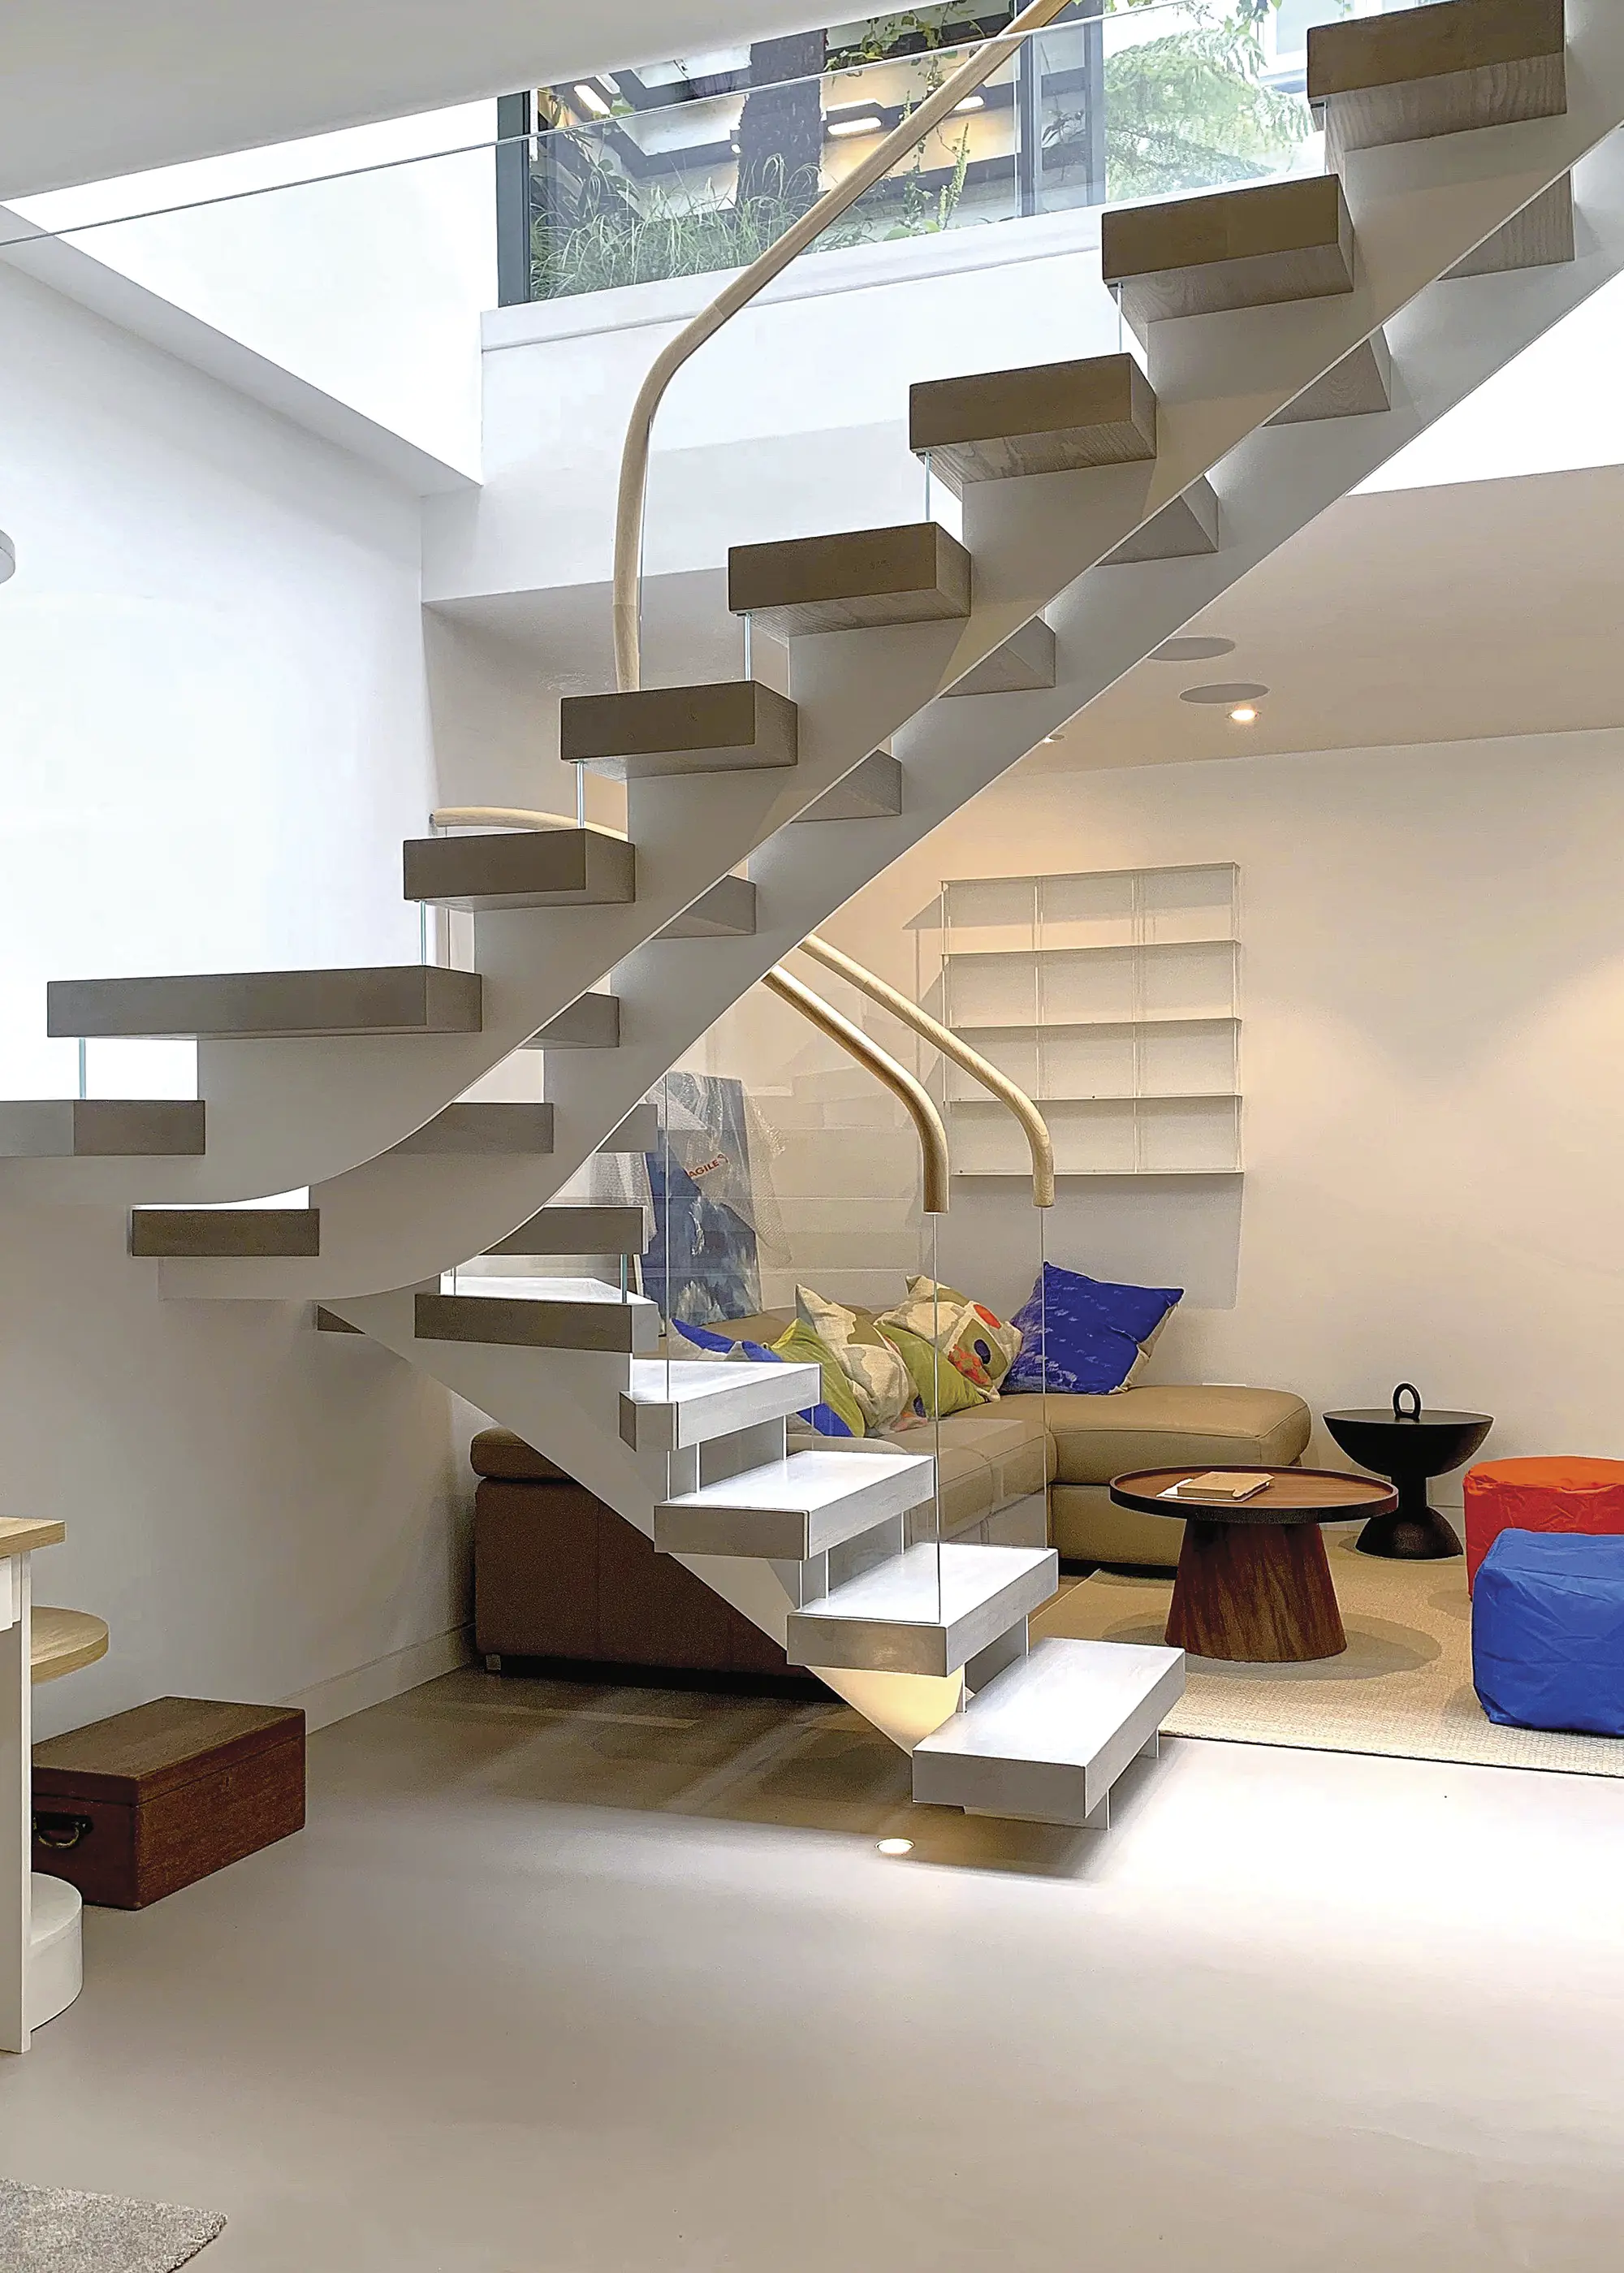
Photo: 2pm Architects
The simplest way to construct this kind of extension is to follow the line of existing structural walls above – otherwise known as underpinning. But it’s also possible to extend horizontally beyond your home’s footprint, which can often allow for rooflights to be installed in the ground above your new subterranean zone.
2pm Architects
This basement extension project (above) in London stretches the length of the home’s entire floorplan and beyond to the rear garden. The bespoke staircase with glazed balustrade provides a seamless connection between the upper and lower storeys, while maximising the flow of sunlight into the area. Designed by 2pm Architects, the new space was made to feel like part of the main house, with plenty of natural light and fresh air. A lightwell above brings in even more sun and offers some outdoor views.
Many home extensions can be completed under permitted development (PD), without the need for a formal application. PD rules, however, don’t apply to those who live in listed properties, conservation areas or areas of outstanding natural beauty (AONB).
A property’s PD rights entitlement may have been used up by previous extensions, conversions or outbuildings – so do check before forging ahead. Typically, extensions completed under PD will be finished in similar materials to that of the original house. If you do go down the PD route it may be worth getting a Lawful Development Certificate.
As stated by the Planning Portal, this is what you can do under permitted development:
If you want a large addition or to make a design statement with your extension, you might find the parameters of permitted development (PD) limiting (as set out above). Any innovative details or standout materials that differ to the existing property are likely to require formal consent. If you decide to go down the formal planning route, the first step is to develop a set of drawings, formalising your house extension ideas.
Working with a design professional typically yields the best chance of success. If you need to carry out additional appraisals, such as flood risk assessments, ecological surveys etc, this is the time to appoint the relevant external consultants.
If you live in a listed building or a location with a specially designated status, going through the pre-application process could be beneficial. Once your proposal is submitted, for straightforward projects the process is supposed to take around eight weeks. For more complex schemes, it can take up to 13 weeks. It’s important to monitor the progress of your application once it’s been registered with the planning authority.
Your fees will be dependent on the scope of the project you’re doing. Architects charge on a percentage of the construction cost, and you’ll need to consider other consultant fees to consider, eg ecological and arboricultural surveys. It costs £528 to make a planning application for alterations to a single dwellinghouse, including works within a home’s boundary, such as a rear house extension.
“Neighbours can’t reject your extension plans, only the planning officer can do that, but they can object if they think they are going to lose daylight or privacy, or they don’t like the extension’s design, for example,” says Simon Graham, director at Yard Architects. “It’s wise to speak to your neighbours before you make a planning application for an extension. Show them your extension plans, design ideas, listen to any concerns they may have and try and address these before you make a submission.”
“Opening a clear line of communication will usually prevent neighbours making objections when you make your submission, meaning you are more likely to gain approval smoothly. Objections are weighed up by the planning officer and an objection doesn’t automatically lead to refusal, if the officer doesn’t think the objection is valid.”
A typical starting point for a 25m² single-storey addition built to a standard specification could cost £1,900 to £2,400 per m² of floor space. This spec would include materials such as brick and block, PVCu windows, standard patio doors and torch-on felt or concrete roof tiles. Expect to pay in the region of £2,700+ per m² if you want to use premium materials (aluminium glazed doors, clay tiles etc).
According to Resi, and for average costs in the London area, a side return extension could cost £2,200-£2,600 per m² (for the structural shell). A glazed side return extension might start from £1,300-£1,700 per m².


 Login/register to save Article for later


Hi, looking for some advise and estimates. I currently own an end of terraced 2 storey house. I’m looking to build a 2 storey, 2 bedroom house onto the side of my existing property- the ground floor has approximately 30m2 as does the upstairs (totals to 60m2 for the new build). Can you give me an estimate and a rough idea of how much it will cost from your experience including all costs- its going to be a standard build. It will have a flat roof. Thank you
Hi Tan,
You can use Build It‘s Cost Calculator to get a quick and easy estimate for your build.
Best of luck for your project- we’d love to hear how it turns out.
– Shona, Build It Digital Editorial Assistant