Dormer Loft Conversion Guide: Planning, Design Ideas & Essential Advice
A dormer loft conversion is often one of the best ways to boost space, light and headroom in your property. Extending at roof level will be sure to add value to your home, too, making room for a new bedroom and ensuite, home office or even a playroom.
Positioned within the slope of the roof, this type of vertical addition is ideal for expanding urban properties without gobbling up precious garden amenity. Plus, it’s usually straightforward to achieve without having to apply for planning permission as a dormer loft conversion can usually be achieved under permitted development (PD) rights.
From the different designs available to the costs and what a dormer loft conversion involves, here I’m taking a look at what you need to consider to achieve a successful project from concept to completion.
Dormer Loft Conversion Design Possibilities
Dormer windows come in an array of shapes or sizes, so selecting the style that works best with your dormer loft conversion is important. “This type of extension is hard to categorise in terms of size – it can be anything from 1m to 10m wide, depending on the house,” says James Bernard, director at Plus Rooms.
“A minimum internal head height of 2m is a good rule of thumb to justify a dormer loft conversion addition. From there, you can incorporate glass doors, Juliet balconies or even a sliding entrance with a glass balustrade.”
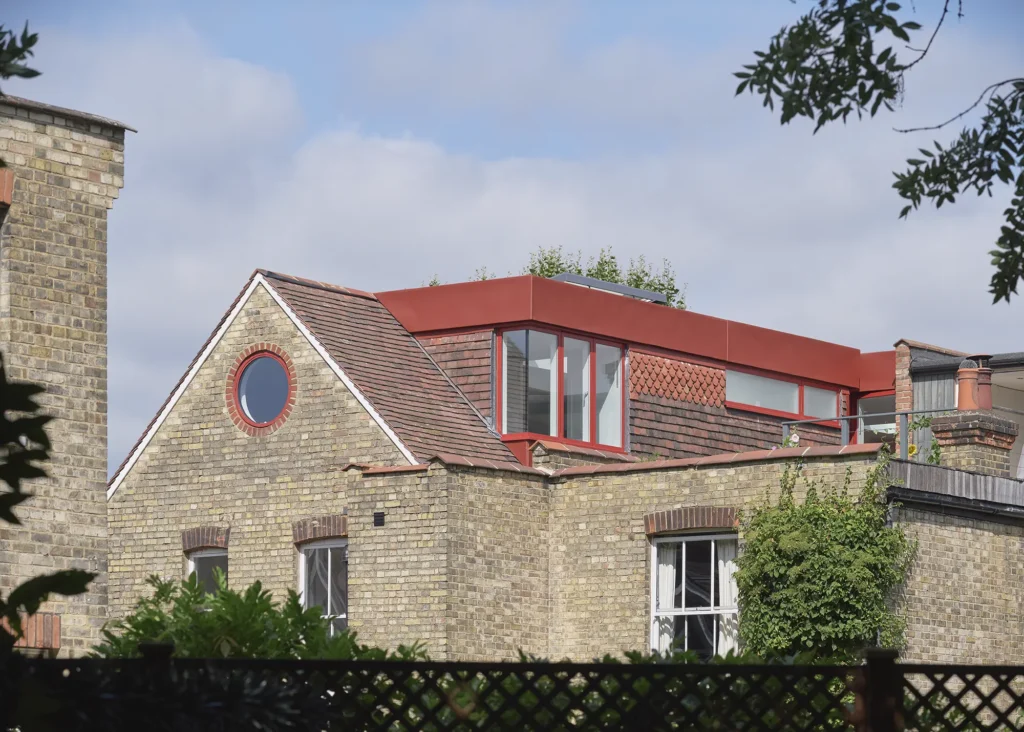
Paul Archer Design are behind this contemporary loft conversion and extension to an Edwardian flat in North London. The former loft area, located on the flat’s second floor, has been completely upgraded to create a new living space with a pitched roof and large, red dormer windows on either side. Photo: Andy Stagg
Try to pick a style of dormer window that complements the aesthetic of the original property. One way to achieve this is to specify exterior materials that complement the existing palette, such as the cladding or roofing materials, or you could even go for something that offers a complete contrast to distinguish old from new and make a contemporary statement.
In terms of shape, a gable-fronted dormer is the most common type, with a double pitched roof made from two sloping sides. A shed-style addition features a flat top that projects out from the existing roof at a shallower angle. Curved designs, such as eyebrow and segmental structures, are also possible and will be sure to add a wealth of wow factor to your existing property’s design.
Read More: Dormer Windows: Top Tips for Getting a Dormer Window Right
Who Can Design & Build a Dormer Loft Extension?
Engaging the services of an architect is one way to put together the initial plans for your dormer loft conversion, before bringing in a contractor to take care of the construction works. Your chosen designer or builder can be appointed to look after project management, if you wish, meaning they’ll oversee the individual trades and coordinate with building control until the project has been signed off.
Another project route is to employ a dedicated specialist firm who will handle the dormer loft conversion project from design to completion. Using a one-stop-shop provider does have its advantages, as you’re only dealing with one point of contact through the whole process. They’ll have the specialist expertise and experience, too, so will be equipped to deal with any unexpected problems or any questions you have along the way.
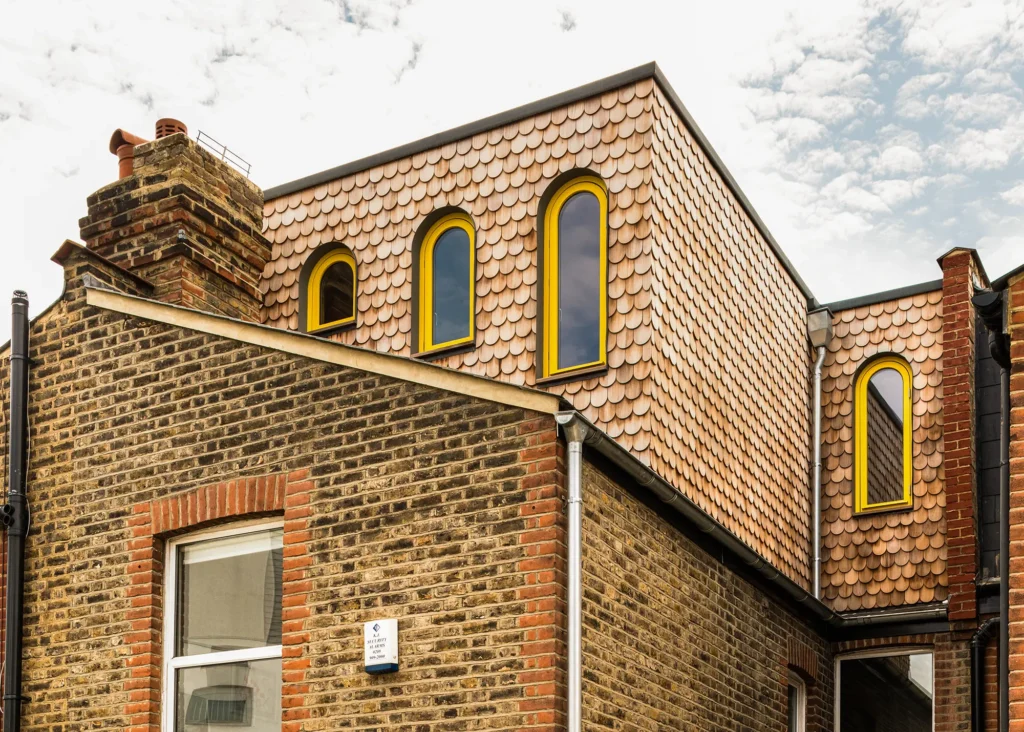
This playful flat roof dormer loft conversion by Office S&M allows for an extra bedroom so each of the owners’ children has their own space. The yellow arch windows and rounded cedar shingles give the dormer a unique aesthetic that successfully contrasts the exterior of the existing house. Photo: French + Tye
Some companies offer a fixed price contract before the build begins, so you’re armed with cost certainty from the start. This will help to manage your finances without the concern of going over budget – keep scrolling to read more about how much a dormer loft conversion costs.
Whichever option you choose for the design and construction of your dormer loft conversion, always check contractors’ credentials before going ahead. “Ensure the company is fully insured and is a member of the relevant associations, such as TrustMark, the Federation of Master Builders, FairTrades and the Guild of Master Craftsmen,” says Rebecca Tibbert, director at Econoloft.
Learn More: Loft Conversions: 10 Key Questions to Ask When Converting a Loft
Is My Attic Suitable for a Dormer Loft Conversion?
To determine whether your roof space is an appropriate candidate for a dormer loft conversion, head height is one of the first aspects to look at. With traditional roofs, built before the 1960s, you’ll need around 2.2m-2.4m of clear height for a straightforward conversion. Modern trussed roofs require more structural alterations (removing braces and reinforcing), so you may need more like 2.4m-2.6m to enable the works.
“The preferred amount of finished headroom inside a dormer loft conversion for a habitable space is 2.3m+. However, this doesn’t need to be maintained across the whole floor area,” says Rob Wood, managing director at Simply Loft. A bigger dormer can work very well in a roof with minimal head height, for instance, while smaller dormer loft extensions are good for attics with a steep existing pitch where you can already stand up inside.
A small addition will still provide your space with valuable daylight and add a design feature that can be used for a desk, sitting area or even a sink if you’re creating a dormer loft conversion for an bathroom or kitchen.
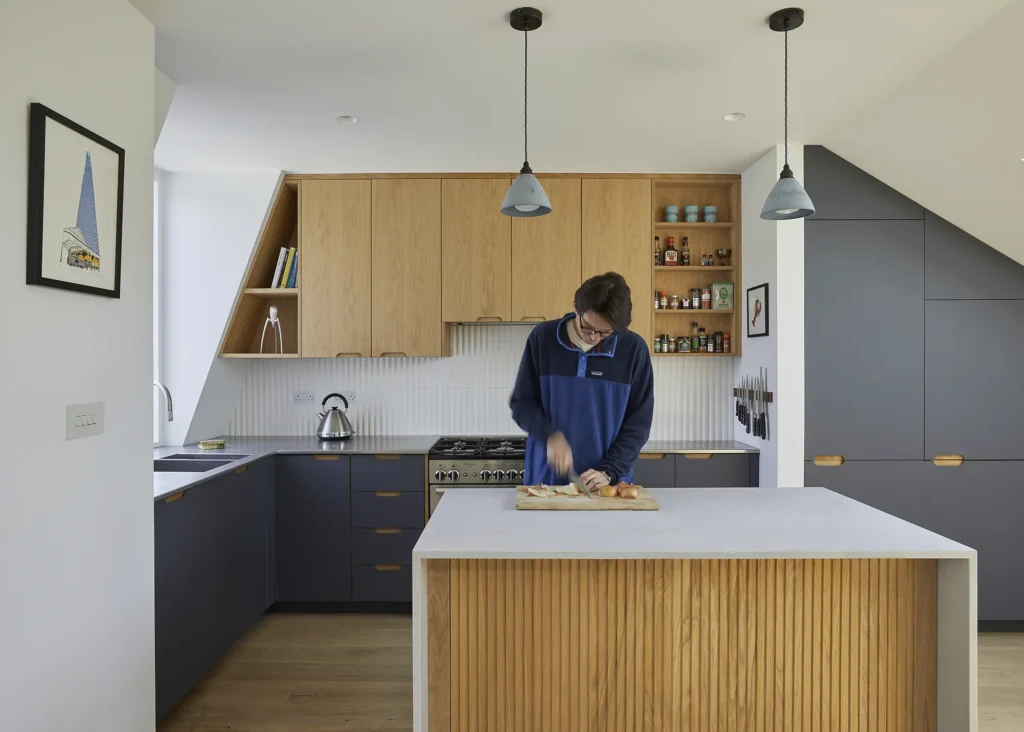
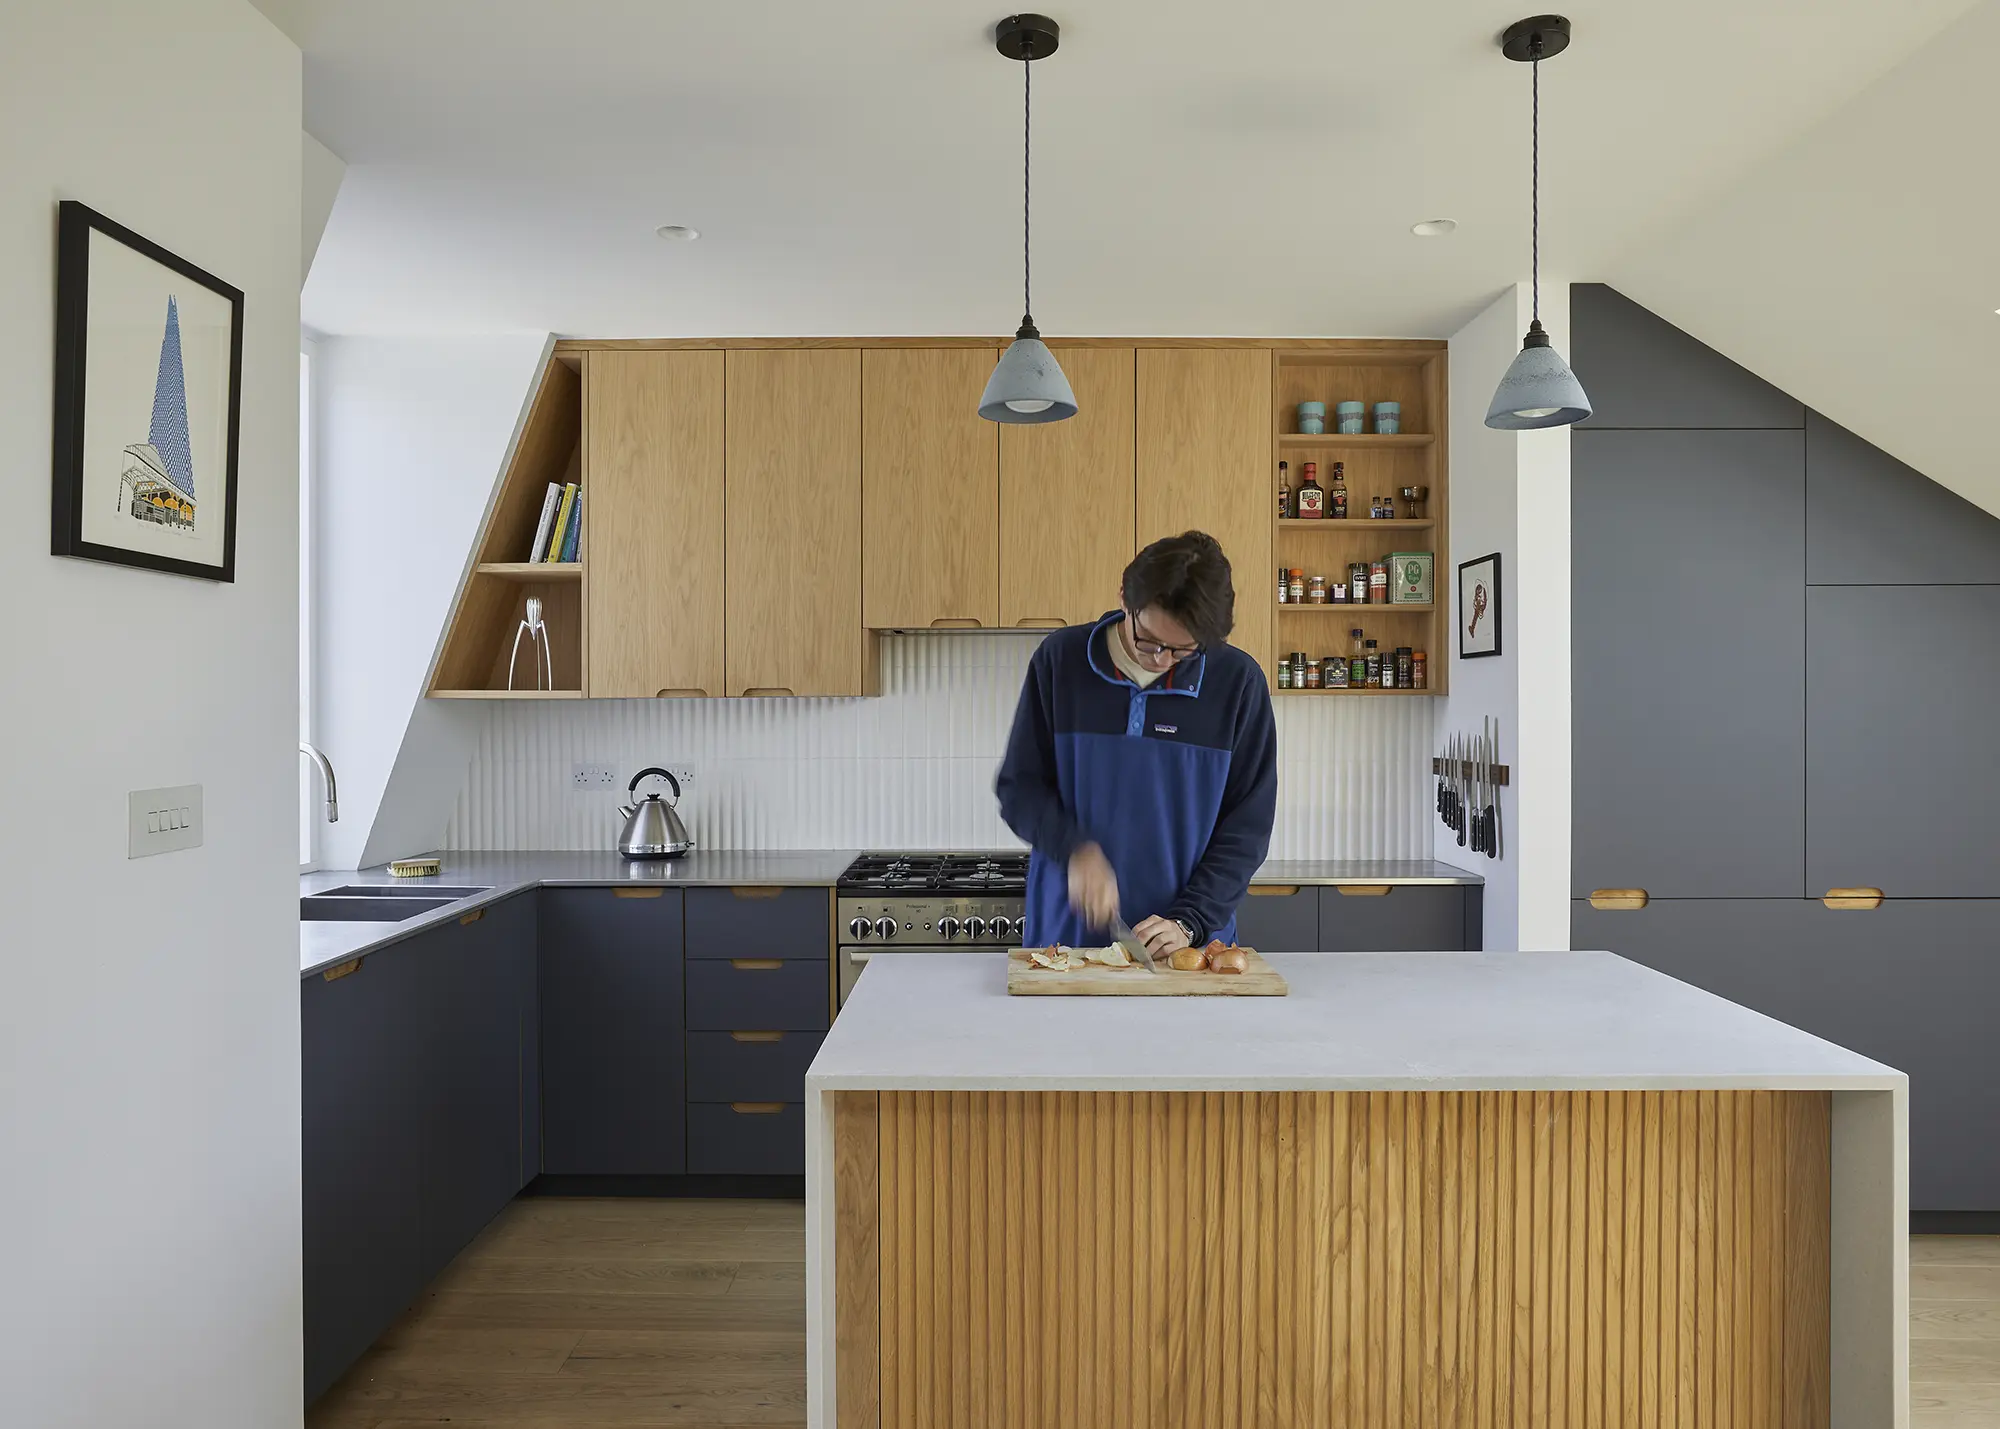
Located in South West London, this maisonette has been completely reconfigured and upgraded with an expansive, light and airy loft conversion, designed by Yard Architects. In the kitchen area, the architects have thoughtfully maximised the dormer windows by utilising the space for the sink to provide full head room and a large window. Photo: Chris Snook
What’s Involved in the Construction of a Dormer Loft Conversion?
First, your contractor will strip back the existing roof of the property. The dormer itself is usually constructed from timber, comprising a roof, side walls (cheeks) and a front wall that typically faces the back garden. Next, the structure is clad in your material of choice and the glazing installed to make it watertight.
An opening is cut into the existing rafters to make way for the new structure. The remaining rafters will often be supported by the dormer, though depending on the size of the opening that has been cut additional reinforcements may be needed.
“Next, a new floor is added internally, as well as first fix plumbing and electrics,” says Rob from Simply Loft. “We then create a new opening leading up from the first floor leading to the loft for the staircase to be installed. The final jobs are plastering, second fix plumbing and electrics, followed by fascias and gutters to the exterior.”
Do I Need Planning Permission for a Dormer Loft Conversion?
If you’re building a dormer loft extension at the back of your property, it’s likely that the works will fall under Permitted Development (PD) rules. If so, you won’t need to apply for formal planning permission which can save you money, time and hassle. Bear in mind that any extensions that protrude beyond the existing plane at the front of the roof will, however, require formal consent.
These are the limitations set out by permitted development:
- The materials used on your dormer loft conversion’s exterior must be similar in appearance to the existing house.
- The volume of enlargement (including any previous enlargements made) must not exceed the original roof space by more than: 40 cubic metres for terraced houses; or 50 cubic metres for other properties.
- The dormer loft conversion must not exceed the height of the existing roof.
- On the principal elevation of the house (where it fronts a highway), must not extend beyond the existing roof slope.
- Side-facing glazing or windows must be obscure-glazed; and, if opening, to be 1.7 metres above the floor of the room in which they are installed.
Any designs that breach these limitations will require you to apply for formal planning permission. Check in with the council if you are unsure whether your dormer loft conversion does exceed these points, or obtain a Lawful Development Certificate for peace of mind – this is a document that clarifies the work you carried out fell under permitted development rights and can come in handy should you chose to sell your home down the line.
Expert Advice: Extending a Home Under Permitted Development: What Can I Build?
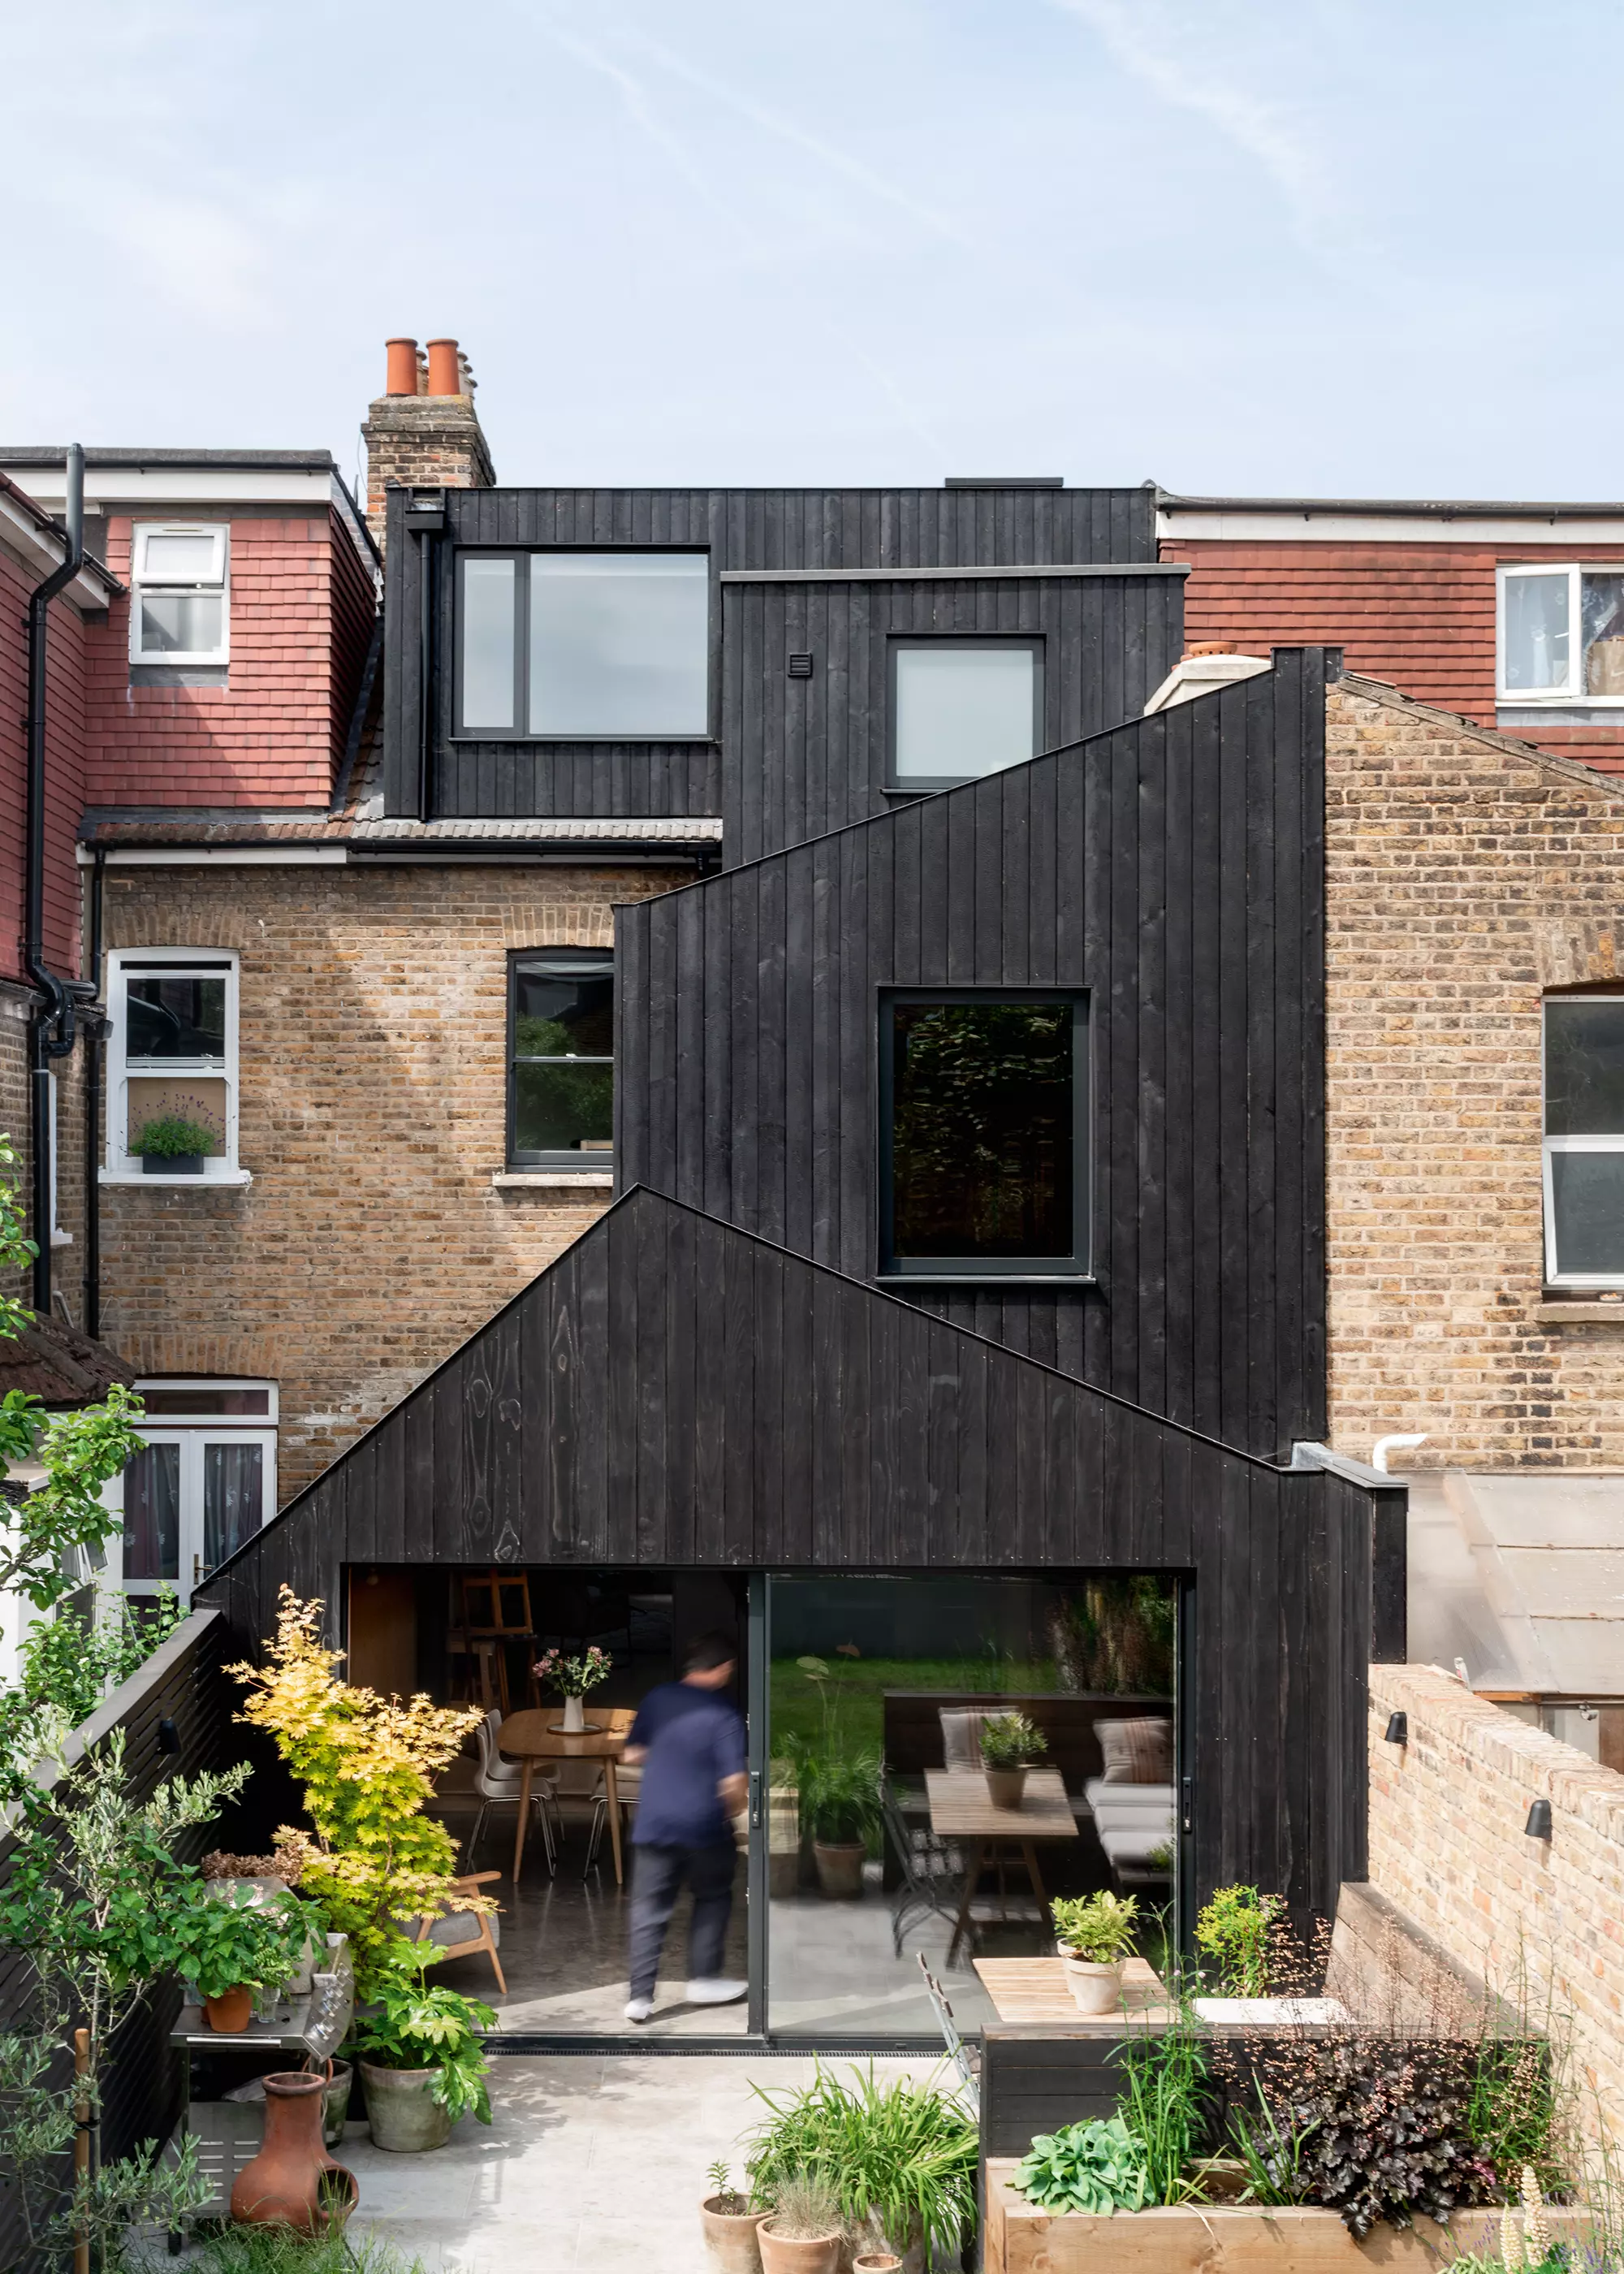
Gresford Architects was behind this multi-storey extension of a Victorian terraced property. The existing awkward layout was replaced by smooth-flowing spaces via a wraparound rear addition and dormer loft extension. The full-height addition is finished with blackened timber, which makes a dramatic statement against the original building’s brickwork. Photo: French + Tye
Permitted development rights do not apply to dormer loft conversion projects if your home is listed or in a designated zone, such as a conservation area. You may require other permissions to make alterations to these properties, such as listed building consent (LBC).
For any loft conversion, including dormer extensions, your scheme is likely to be affected by (but not limited to) Building Regulations regarding thermal performance, ventilation and fire safety. If you’re adding an extra floor to a house that already has two storeys, providing a safe means of escape in the event of a fire is vital.
Your designer, structural engineer and trades should work with you to ensure everything is up to standard, and building control (or your appointed approved inspector) will carry out routine inspections as the work progresses to make sure your project is proceeding as expected.
How Much Does a Dormer Loft Conversion Cost in the UK?
The cost of your dormer loft conversion project will depend on a whole host of variables. For example, location, the materials you’re specifying and the size of the extension will each impact the total cost. You should also factor in how much additional work is required inside – extending your home may be a good time to assess whether to upgrade or relocate your boiler (this will add to the total sum).
Available head height is a key factor when it comes to establishing the likely costs of creating habitable loft space.
According to Build It’s Estimating Service, a typical dormer loft conversion will start at around £2,000 per m², fully-finished and ready to inhabit. If you’re extending the loft to add more space, such as with a hip-to-gable or mansard, expect to pay significantly more – budget from around £2,550 per m². The costs assume that the roof tiles do not need replacing, and are based on a main contractor or loft specialist route.
Learn More: Extension Costs: What Kind of Extension Can I Build For My Budget?





























 Login/register to save Article for later

